List view
New Releases
New Releases
Getting Started
Getting Started
Order Management
Order Management
Inspection Management
Inspection Management
Templates
Templates
Step by step guide
Reminder: In Fingertip, everything starts with an order. Each order consists of a set of Properties that make up your Order Info. There are 3 ways to create an order: Manually (from scratch, with or without a template), via Excel document upload or through an API connection to your existing ERP solution where all your order info sits.
Summary of Order Creation from Scratch without a template:
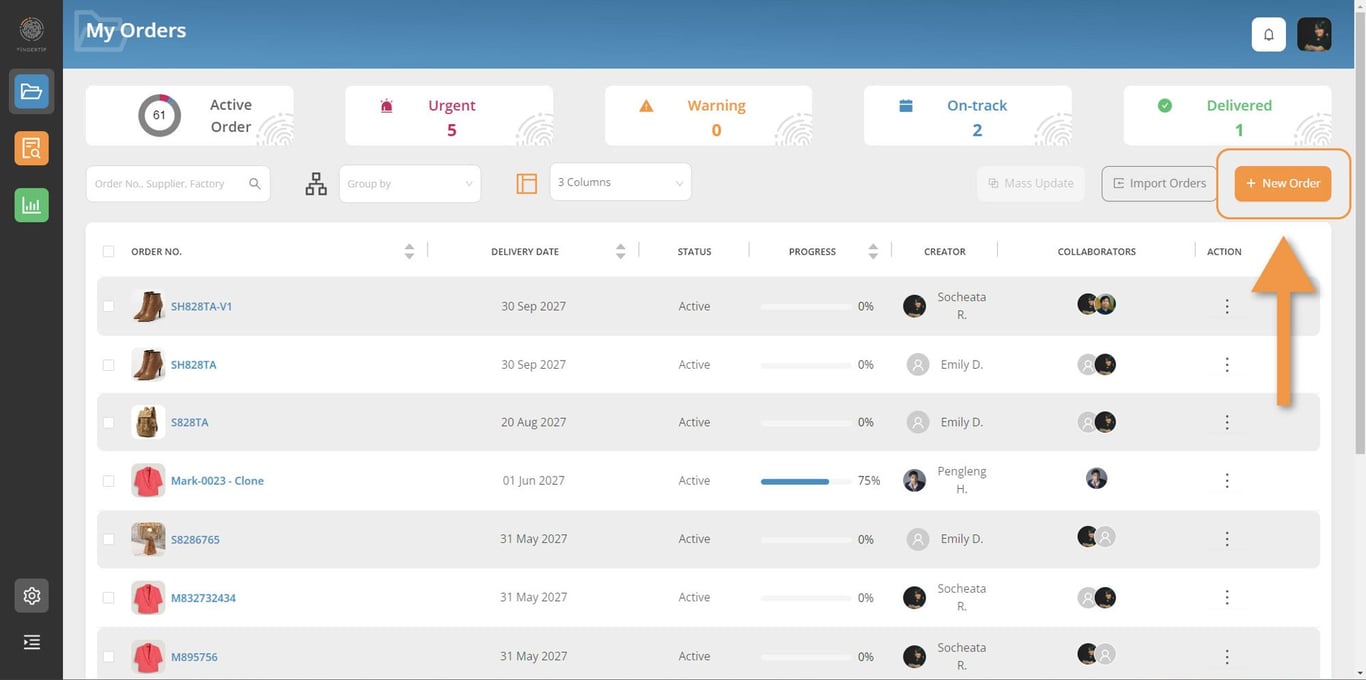
📝 Step 1: Click on “+ New Order” button on your Order List page
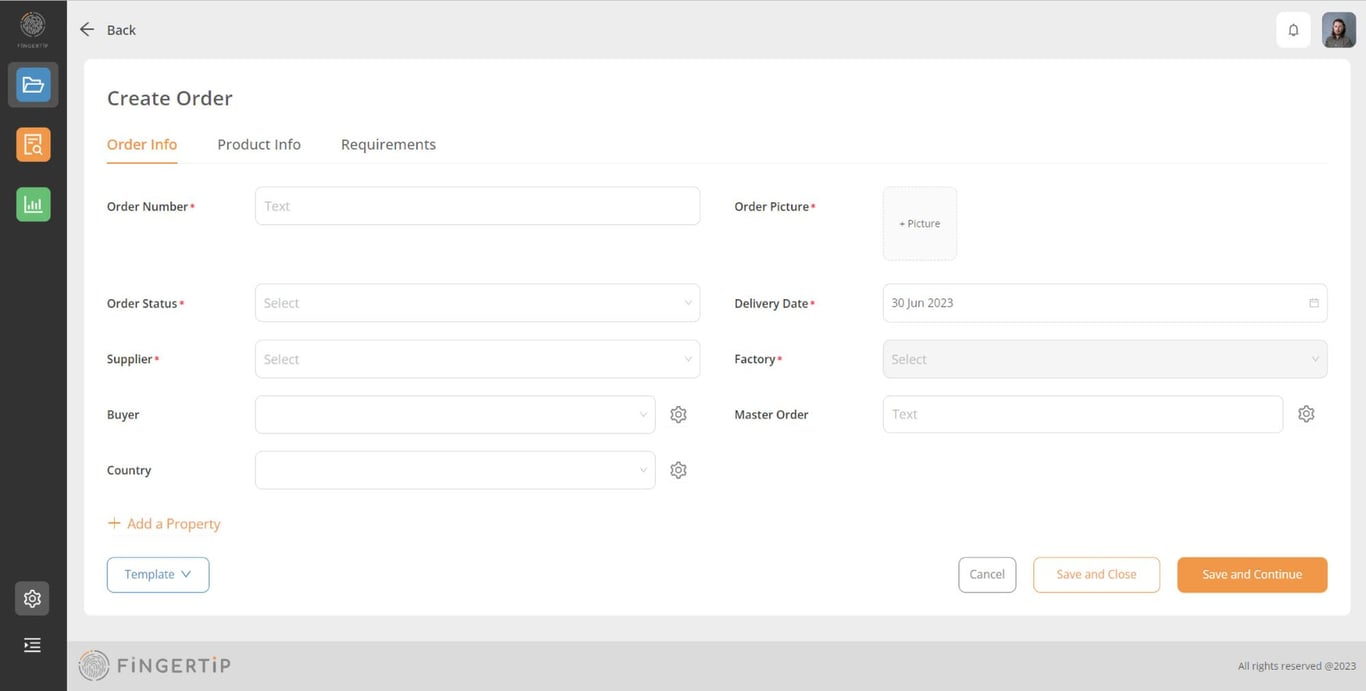
📝 Step 2: Fill in the property fields in ORDER INFO Tab
📝 Step 3: Fill in the property fields in PRODUCT INFO Tab
📝 Step 4: Fill in the property fields in REQUIREMENTS Tab
📝 Step 5: Save the order and start enjoying our TnA Tracker module to follow-up on your order’s on-time delivery and our Inspection module
Detailed steps of Order Creation from Scratch without a template:
Step 1: Click on “+ New Order” button on your Order List page
Order Info Tab
Step 2: Fill in the property fields in ORDER INFO Tab
⚠️ Only Properties with a red star (*) are mandatory
Product Info Tab
Step 3: Fill in the property fields in PRODUCT INFO Tab
Information section
As you create your order, you can also fill in your Product Info. The default product info properties are:
- Style ID
- Brand
- Product Category
- Product Description
- Colors
- Sizes
- Destinations
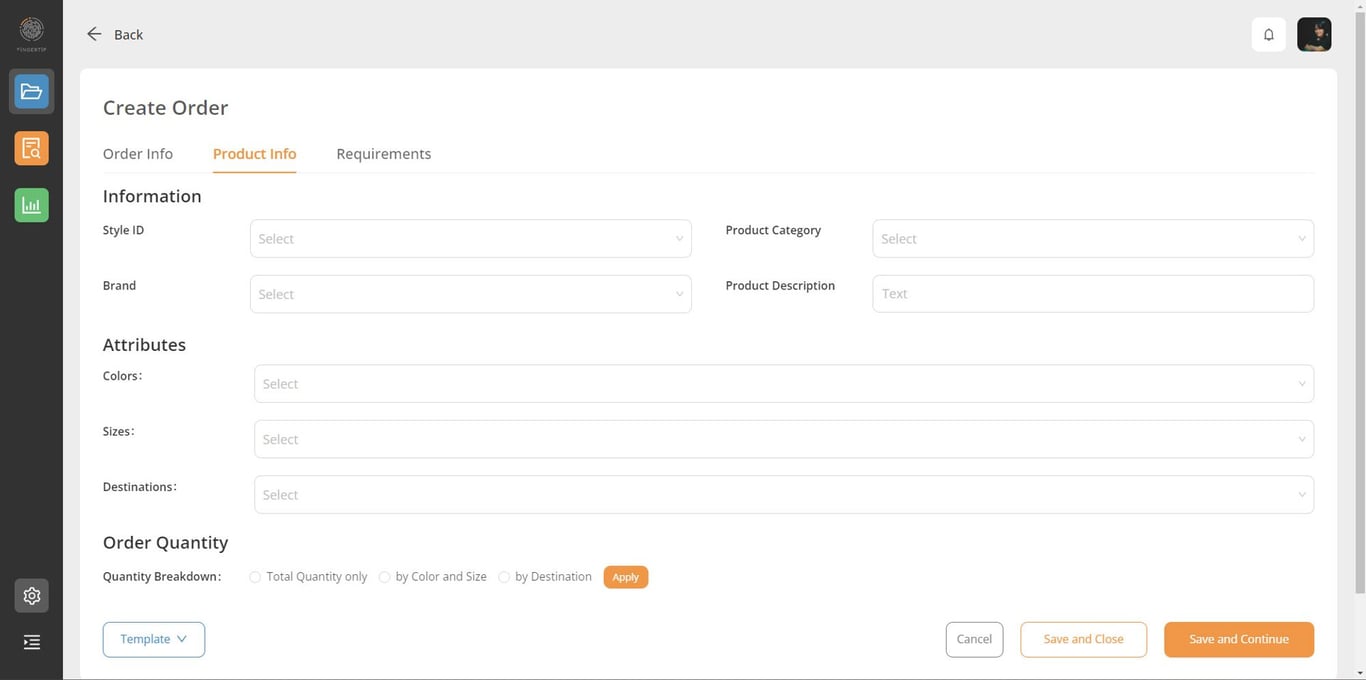
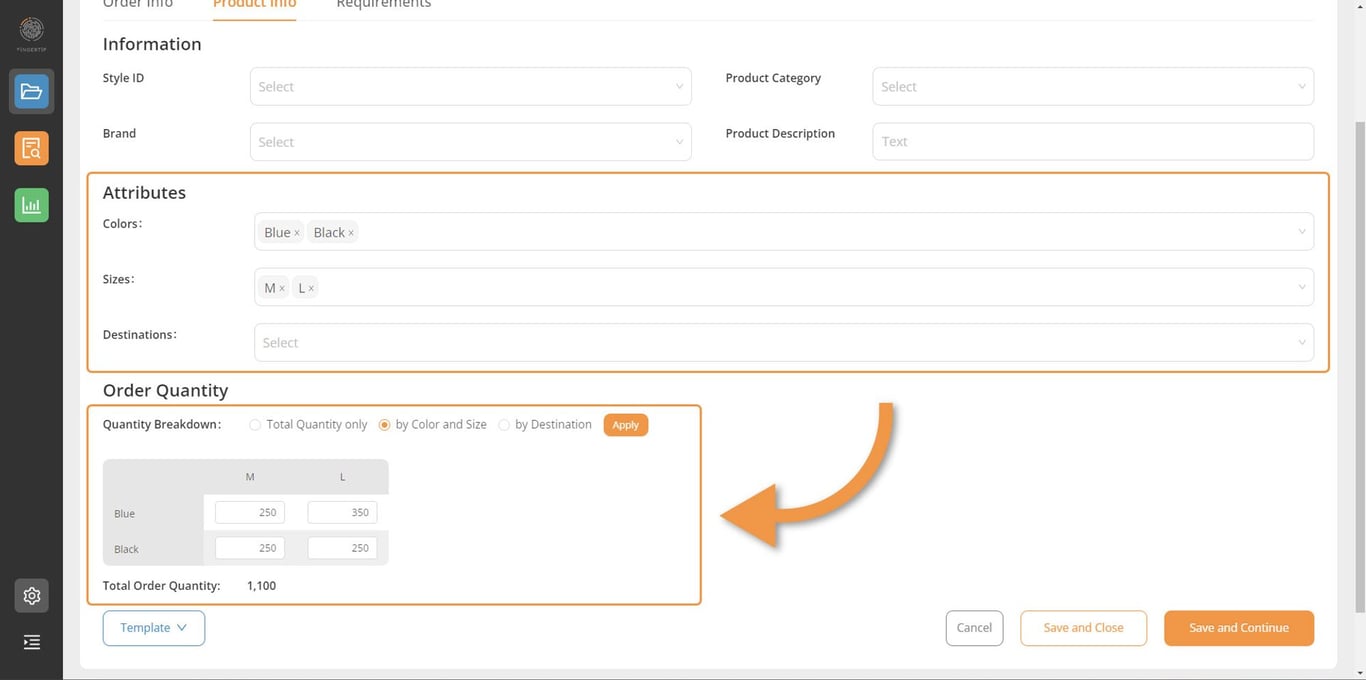
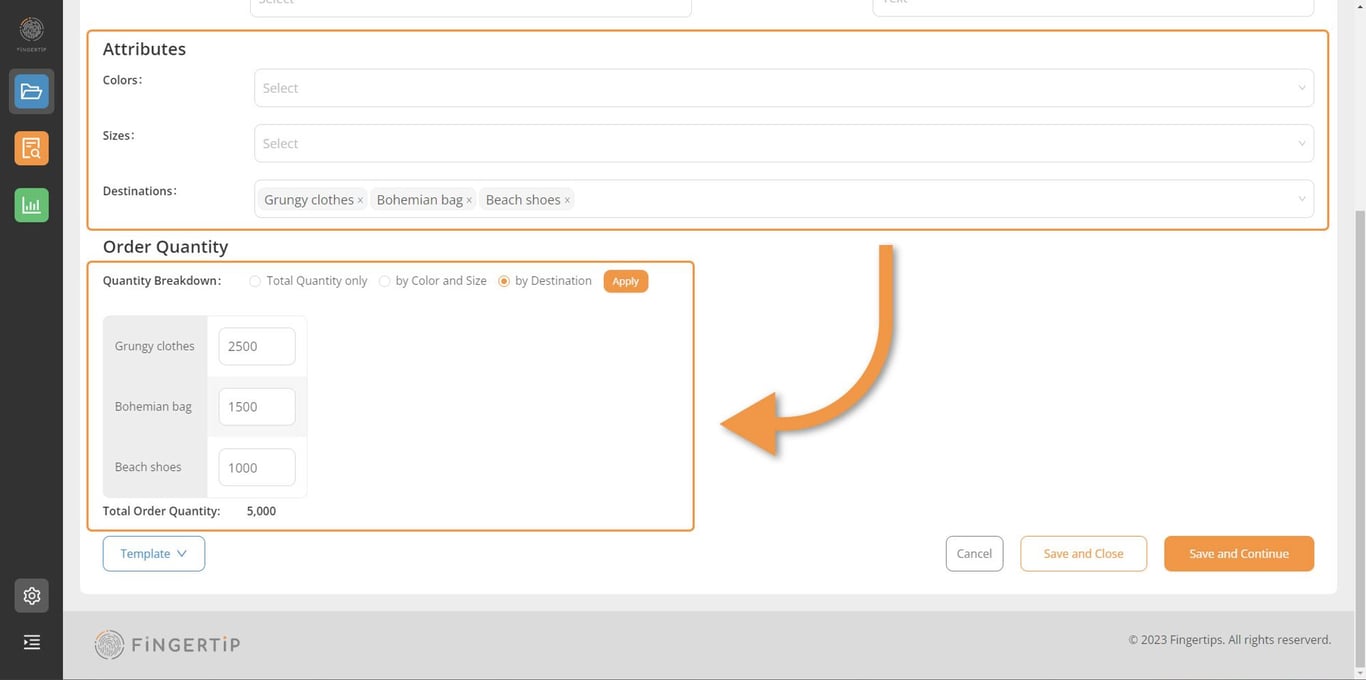
Attributes section
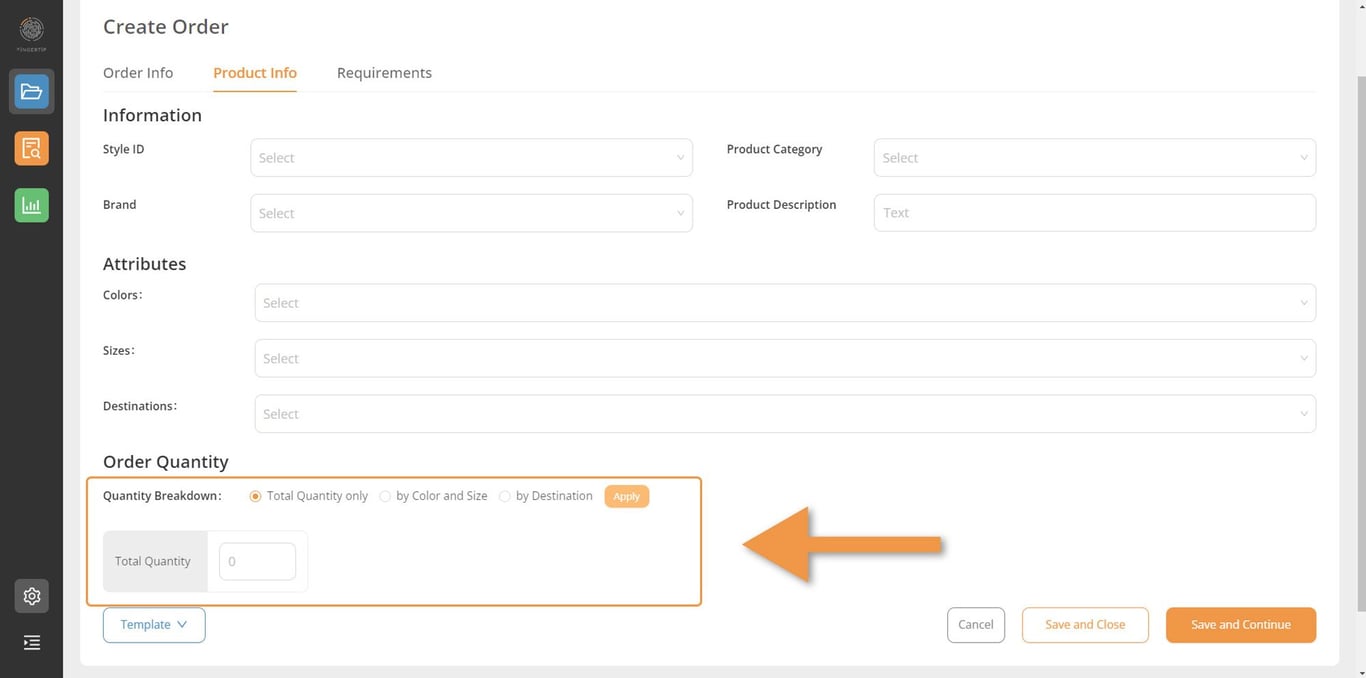
Create order quantity
Fingertip relies on user inputting quantity based on its total or by using the breakdown of colors and sizes, or destinations. As you enter the total quantity, the quantity by colors and sizes, or quantity by destinations in the respective fields, a table is automatically created as you hit the “Apply” button. Then fill in your quantities before saving.
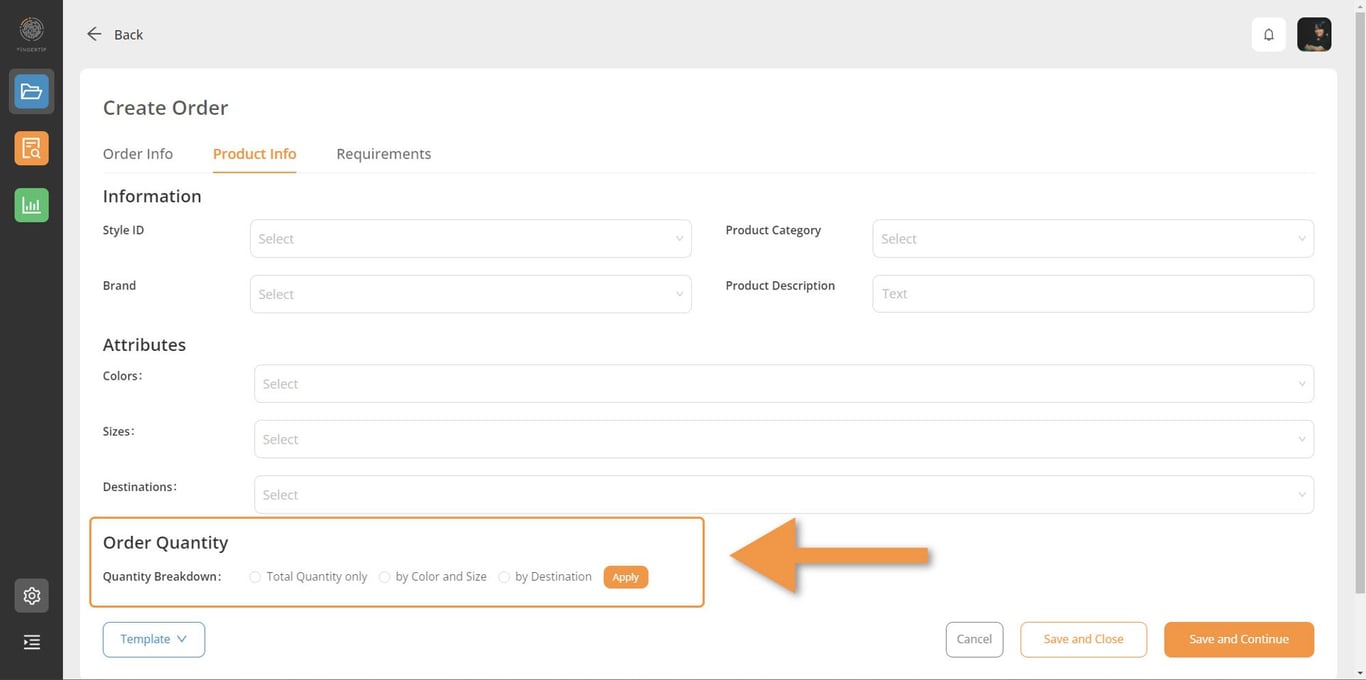
Total Quantity
If you plan to inspect your order/article/PO based on its total quantity, simply check the “Total quantity only” and click on “Apply” button. You can then enter that quantity in the table that just opened below.
Breakdown by Color & Size
If you plan to inspect your order/article/PO based on various styles or items, choose the “by Color and Size” option. Once you click on the “Apply” button the quantity table opens. Fill in quantities for each combination of color/size before saving. These quantities will be shown in your Fingertip QA/QC app when you start inspecting this order.
Breakdown by Destinations
If you plan to inspect your order/article/PO based on various destinations, choose the “by Destinations” option. Once you click on the “Apply” button the quantity table opens. Fill in quantities for each destination before saving. These quantities will be shown in your Fingertip QA/QC app when you start inspecting this order.
Requirements Tab
Step 4: Requirements tab allows you to fill in some of the specs of your product. These specs will then automatically be available in your inspections.
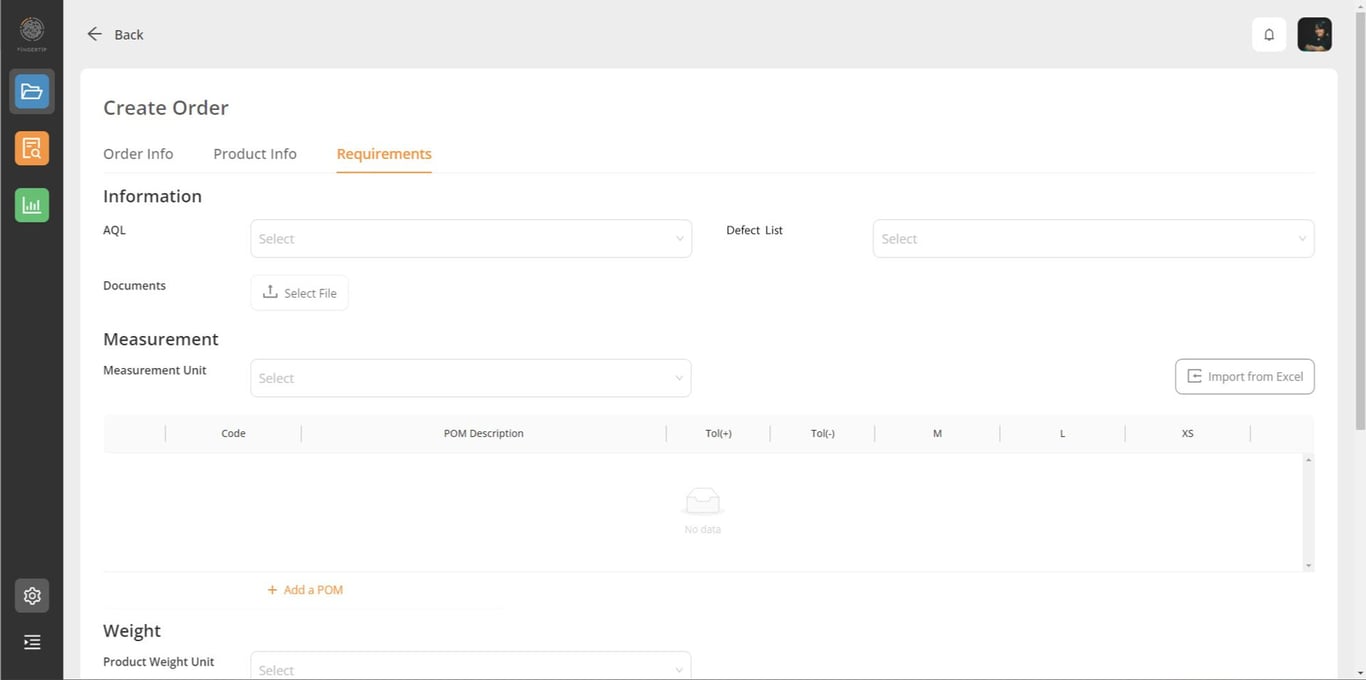
Information Section
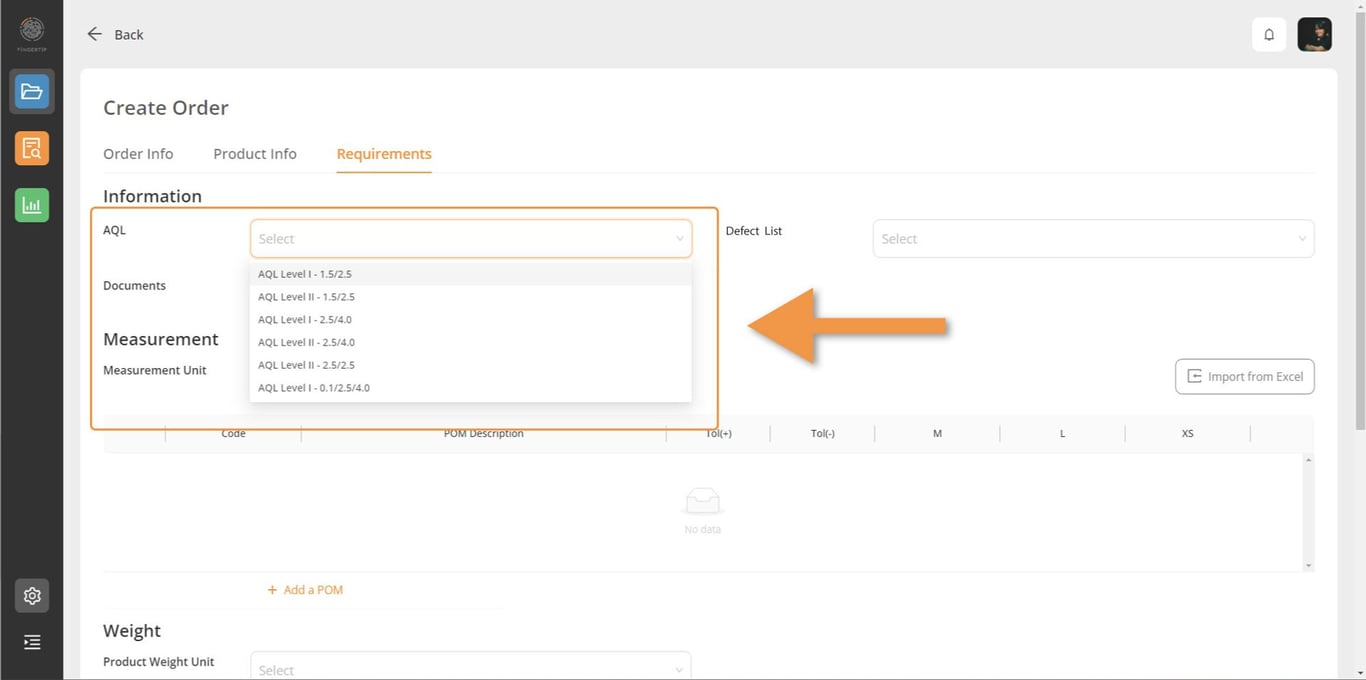
AQL
Select your AQL level which will be used for your inspections. To add an inspection level to your AQL list, go to settings to create a new one. (Only available to Admin role)
Select your AQL level which will be used for your inspections. To add an inspection level to your AQL list, go to settings to create a new one. (Only available to Admin role)
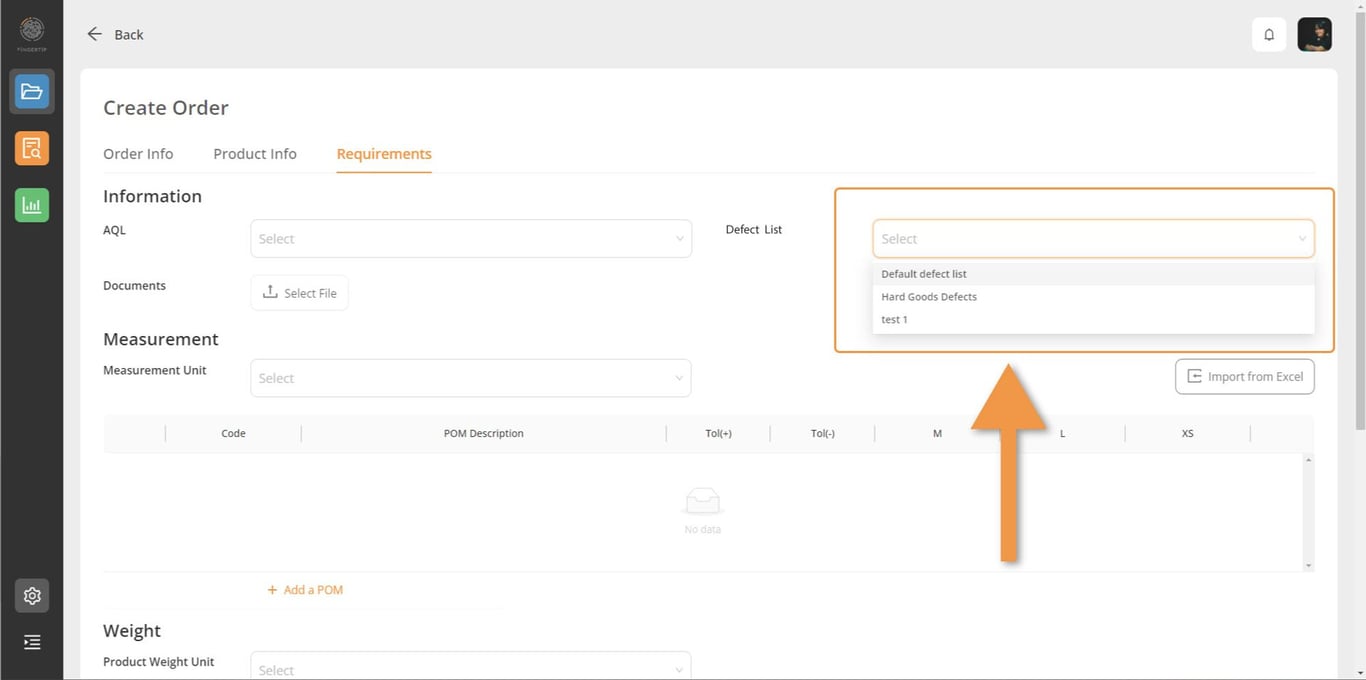
Defect List
Select the defect list which will be used for your inspections. If not selected, the default defect list of your company will be used. Go to settings to create or manage your defect lists. (Only available to Admin role)
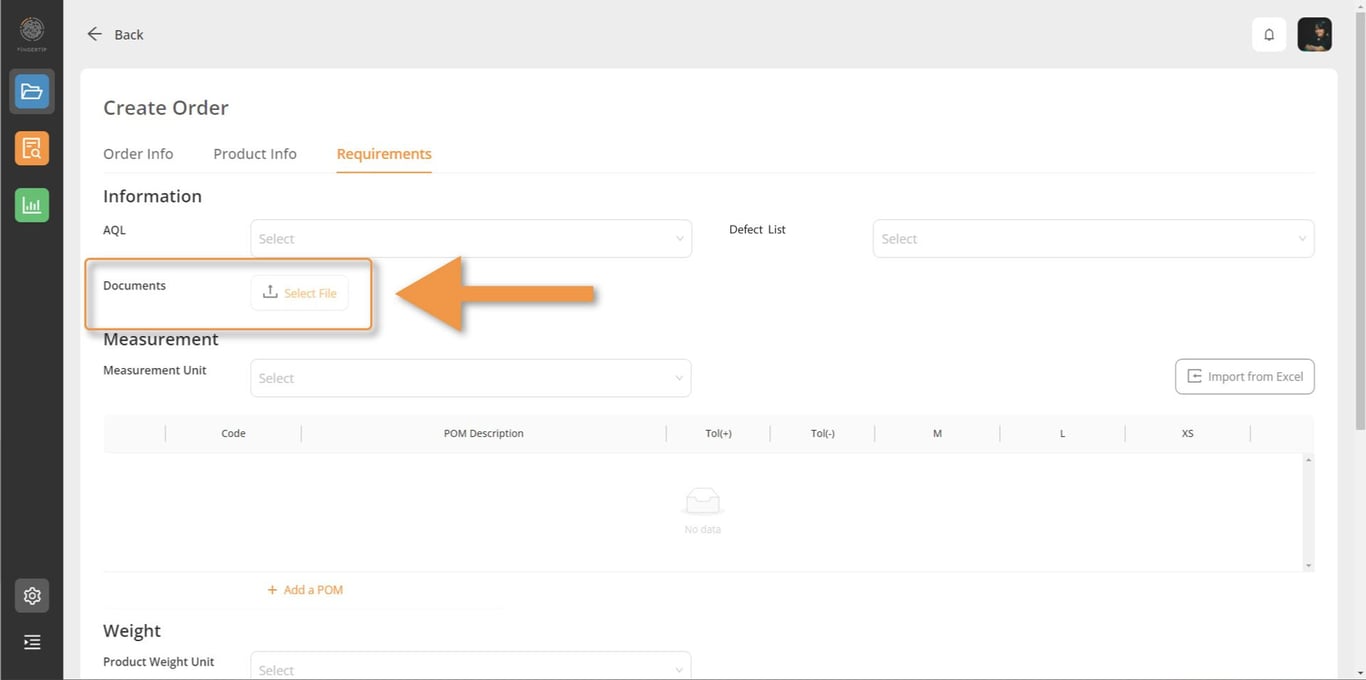
Documents
Upload here all specs document you want attached to your order. These documents will be automatically added to your inspections, allowing your inspectors to download them on their mobile phone or tablet for reference.
Measurement Section
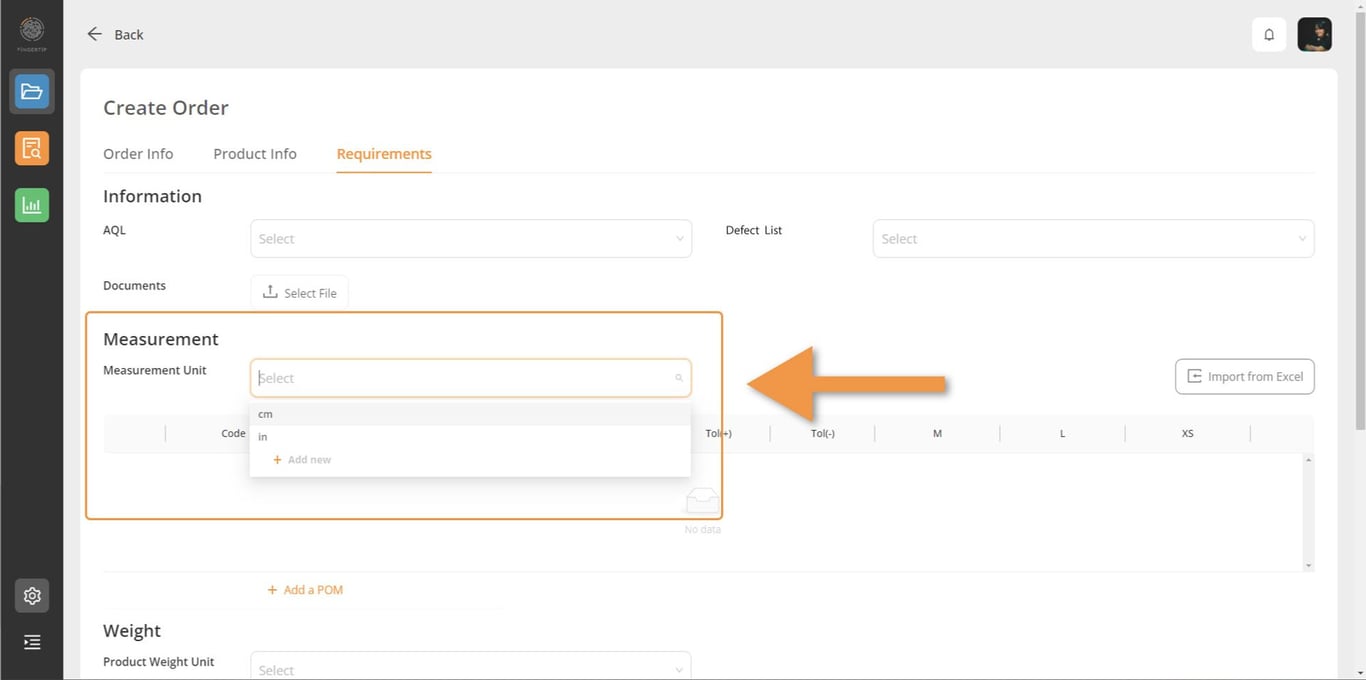
Measurement unit
Select “cm” or “in”. You can also create any additional measurement Unit by typing it in the field and clicking on “+Add new” option.
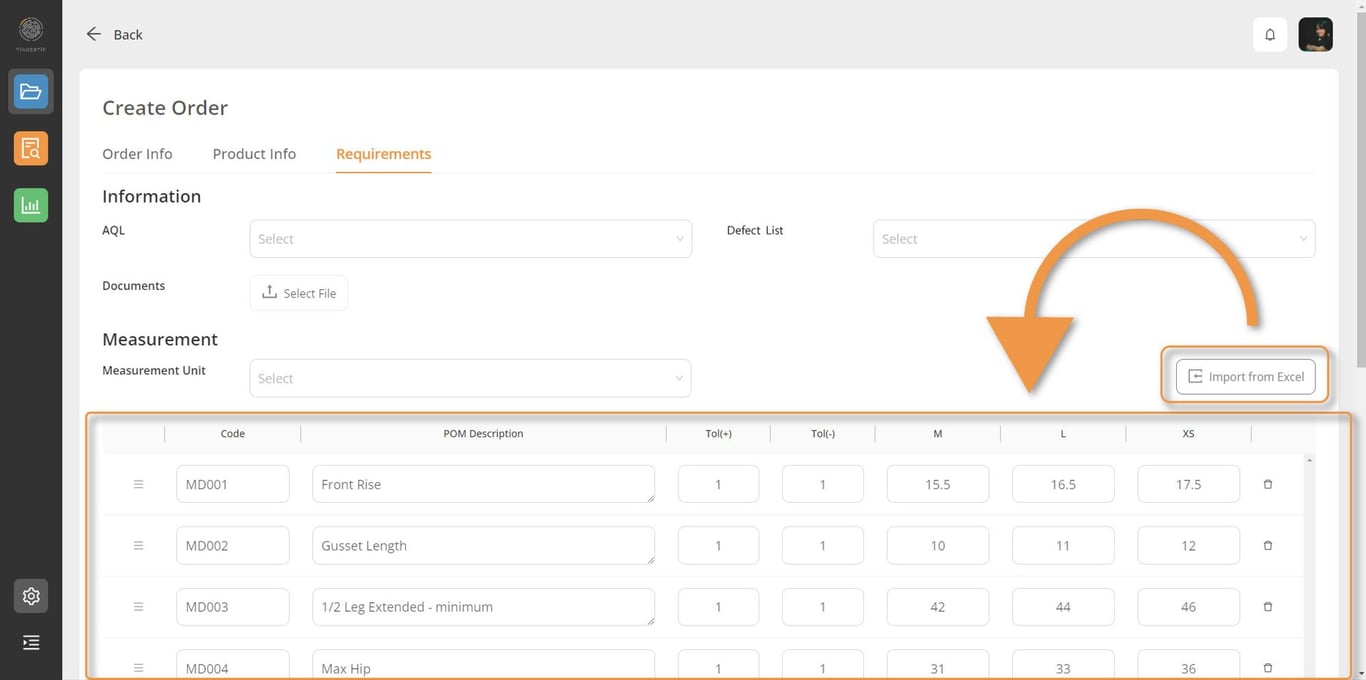
Measurement chart
Input your point of measurement list here. POM description, tolerance and measurement for each size.
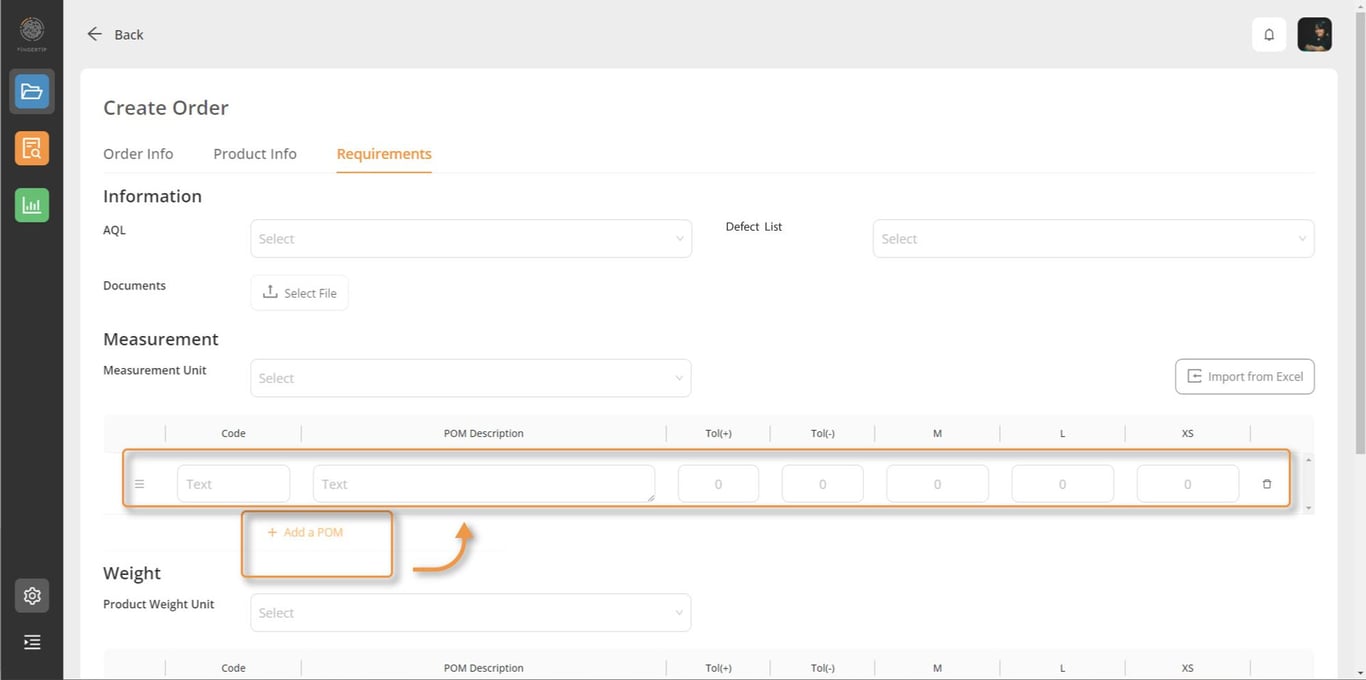
⚠️ Note that this chart can be created automatically through Excel doc upload for POM
Excel doc upload for POM list creation (Expand this chapter to see details)
At Fingertip, we understand you might not want to manually input all your POM details manually, especially if you already have that data sitting on an Excel doc. That is why you can automatically create your measurement chart for your product, through an Excel upload. These Points of Measurement will then be reflected in your Fingertip: QA/QC app allowing your inspectors to measure all POM according to your chart.
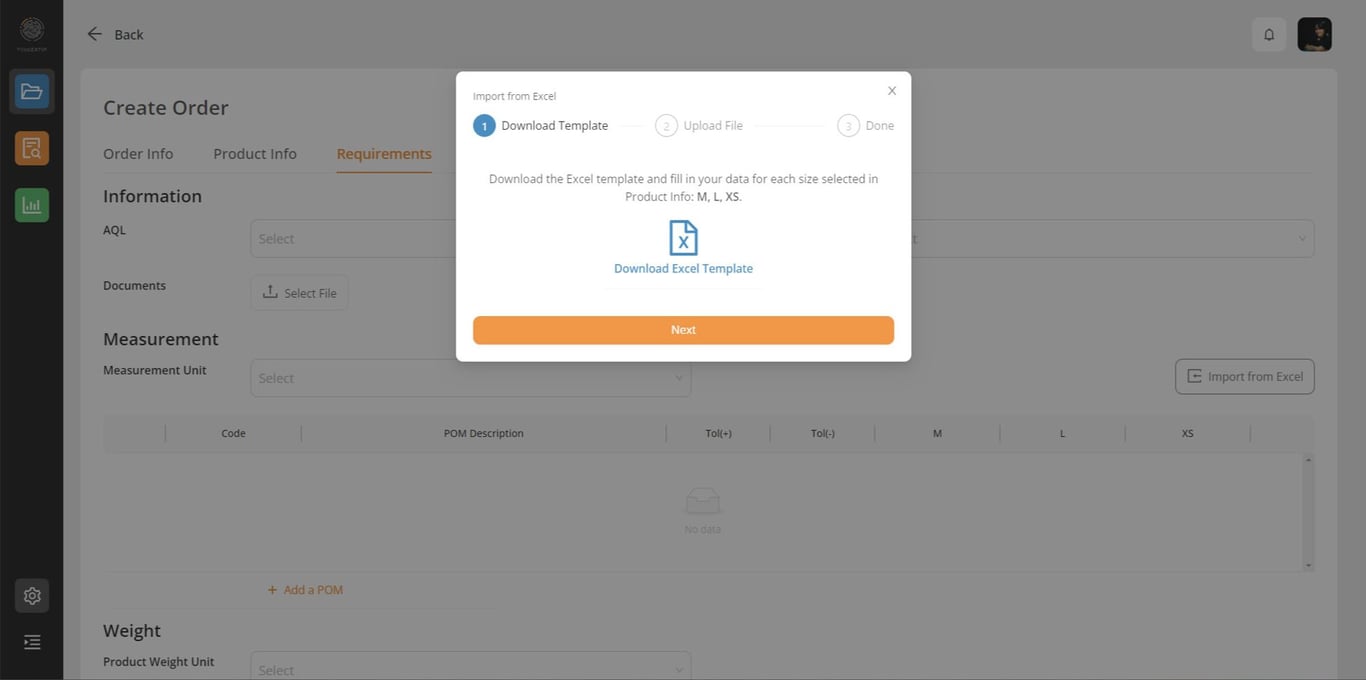
That process is made of 3 steps:
Step 1: Download Template
In your measurement section, start with clicking on the button “Import from Excel”. In the dialog box that just opened, you are reminded of the sizes registered for your product. If they match, go ahead and download your template by clicking on the blue Excel file icon. As you click on it, the template is being downloaded in your download folder on your computer.
As you open the template, you’ll see a table with your styles and your sizes divided in columns. Enter your points of measurements, or copy paste them from an existing document and once you are done, save your file.
⚠️ Note: while you work on your Excel file, keep the dialogue box opened in Fingertip
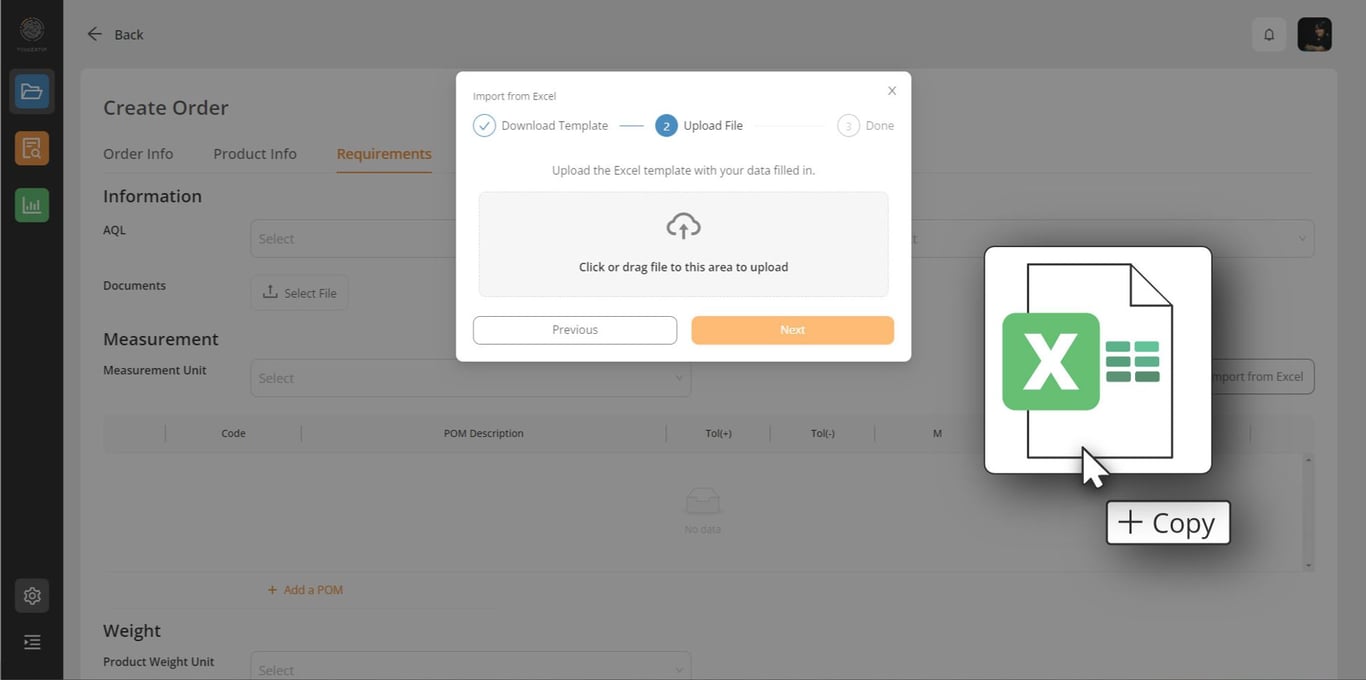
Step 2: Upload File
Once your Excel document is ready, click “Next” in the dialogue box and move to step 2: “Upload File”. Drag and drop your file or simply click on the cloud icon to select your Excel file. Then click on the “Next” button.
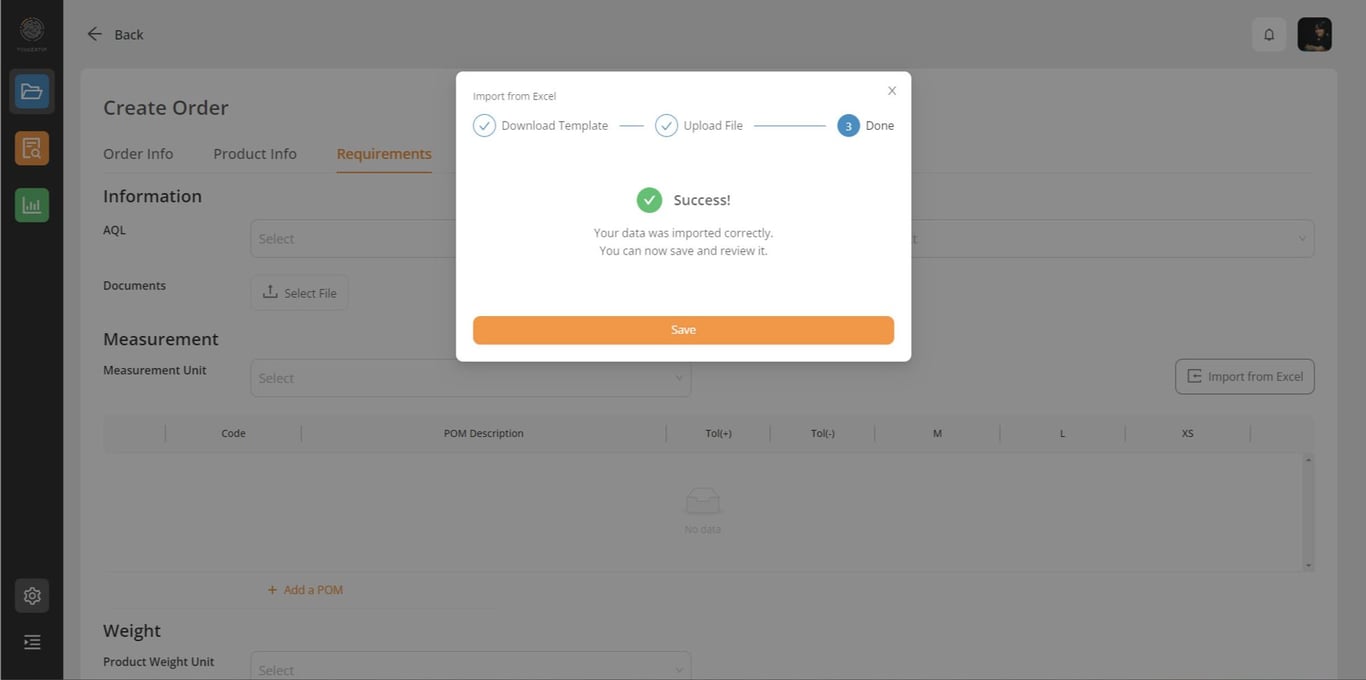
Step 3: Done
If everything is in order, you’ll see a success message. Close the dialog box and see all your Points of Measurements filled in accordingly. If an error occurred, you’ll see the details in order to correct your file and upload it back.
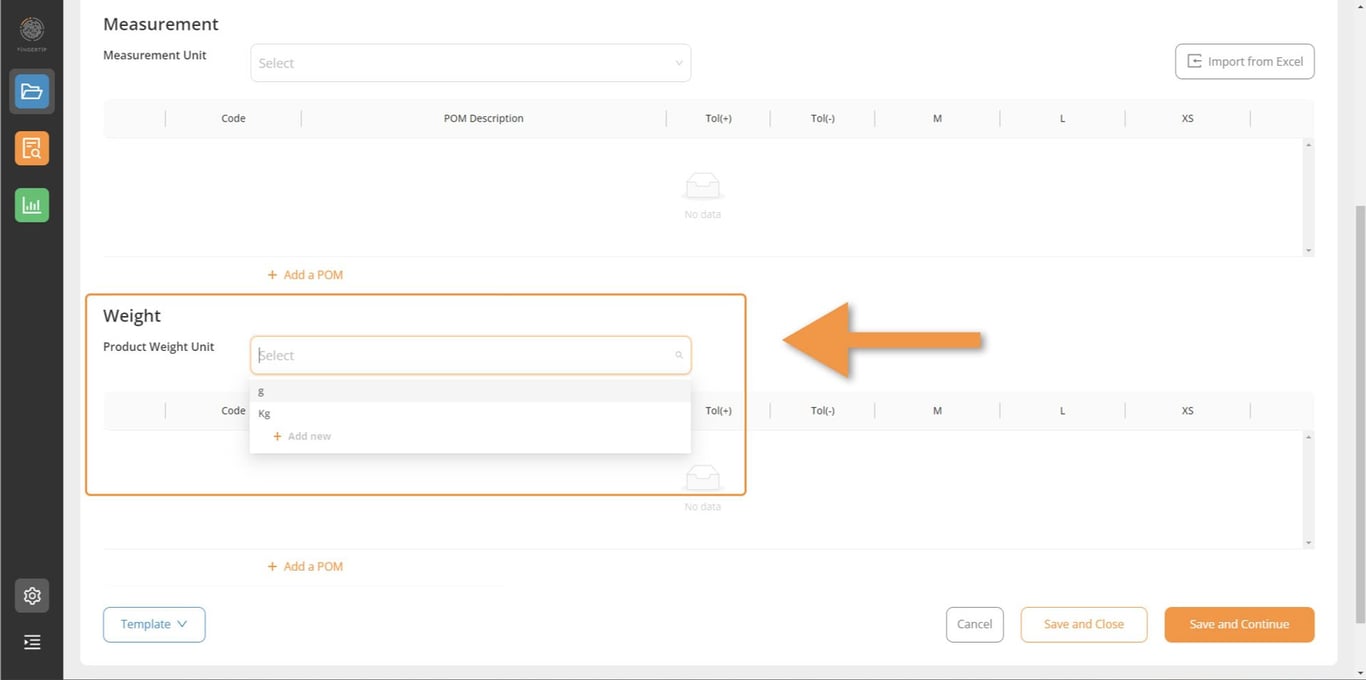
Weight Section
Weight
Start by creating your own weight chart. In Fingertip, you can simply add your weight specs to be inspected later on by your inspectors during inspection.
Product weight unit
Select your unit type (ex: g, oz, etc..). You can also create any additional weight units by typing it in the field and clicking on “+Add new” option.
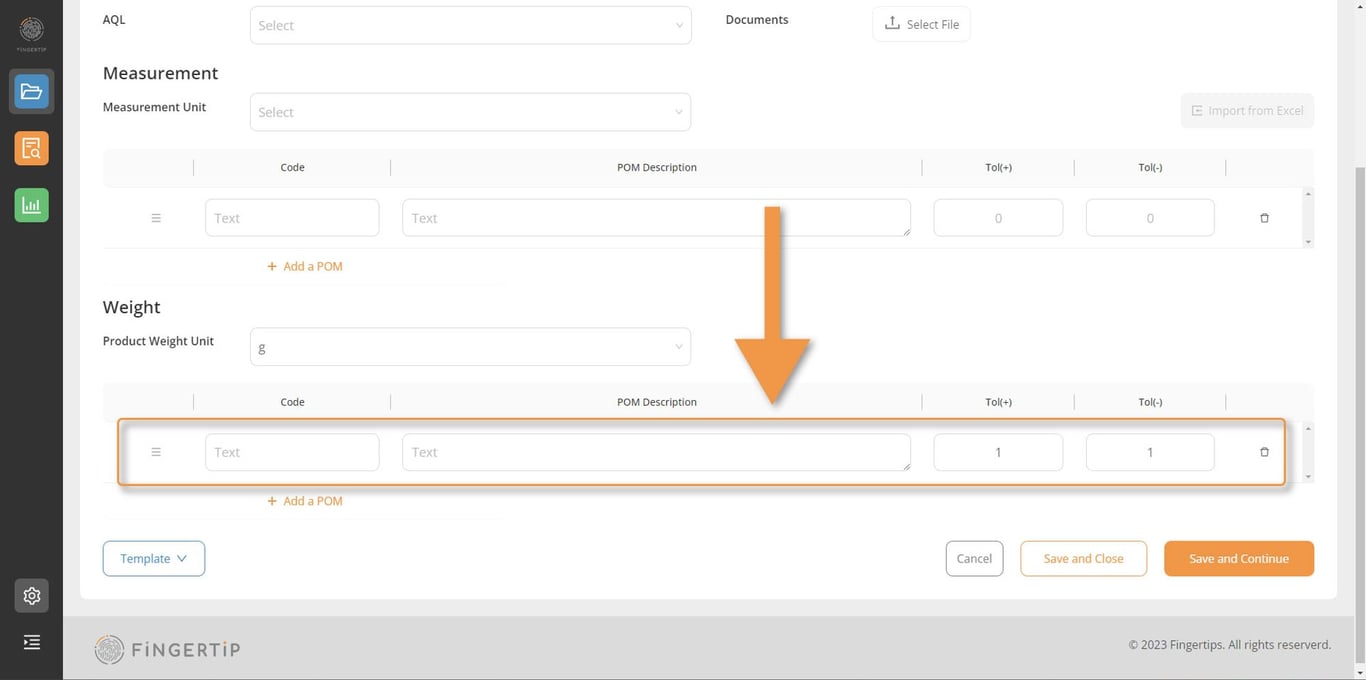
Create your weight chart
Click on “+ Add a POM” to start adding your weight specs. Input your point of measurement list here. POM description, tolerance and measurement for each size., you see an empty Weight / POM chart table.
Detailed steps of Order Creation from Scratch with a template:
You don’t have to add your custom properties every time you create an order. With Fingertip you can easily create and re-use a template to save time on your order creation.
Start by clicking on “NEW ORDER” button from your order listing page, the same way you did in CREATE AN ORDER FROM SCRATCH WITHOUT A TEMPLATE.
Select your template
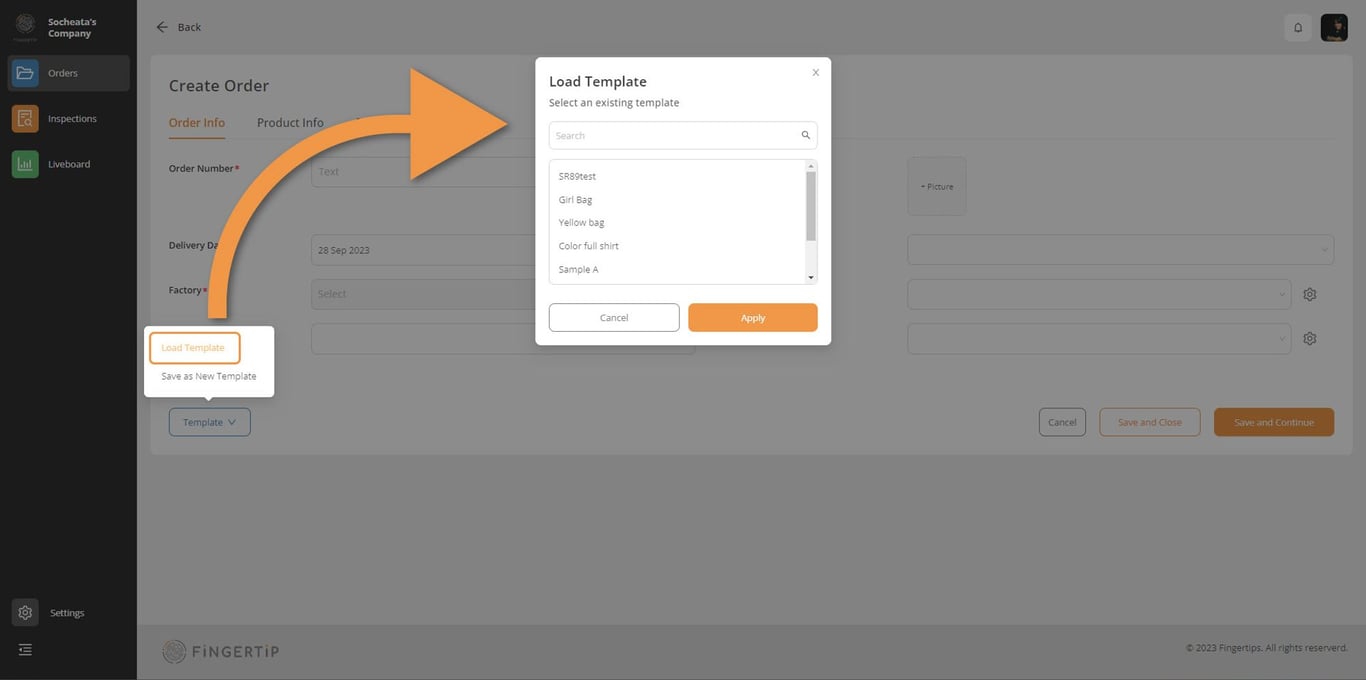
When clicking on “+ New Order” button, as you now know, you access the order creation page. You can see at the left bottom a blue button “Template”.
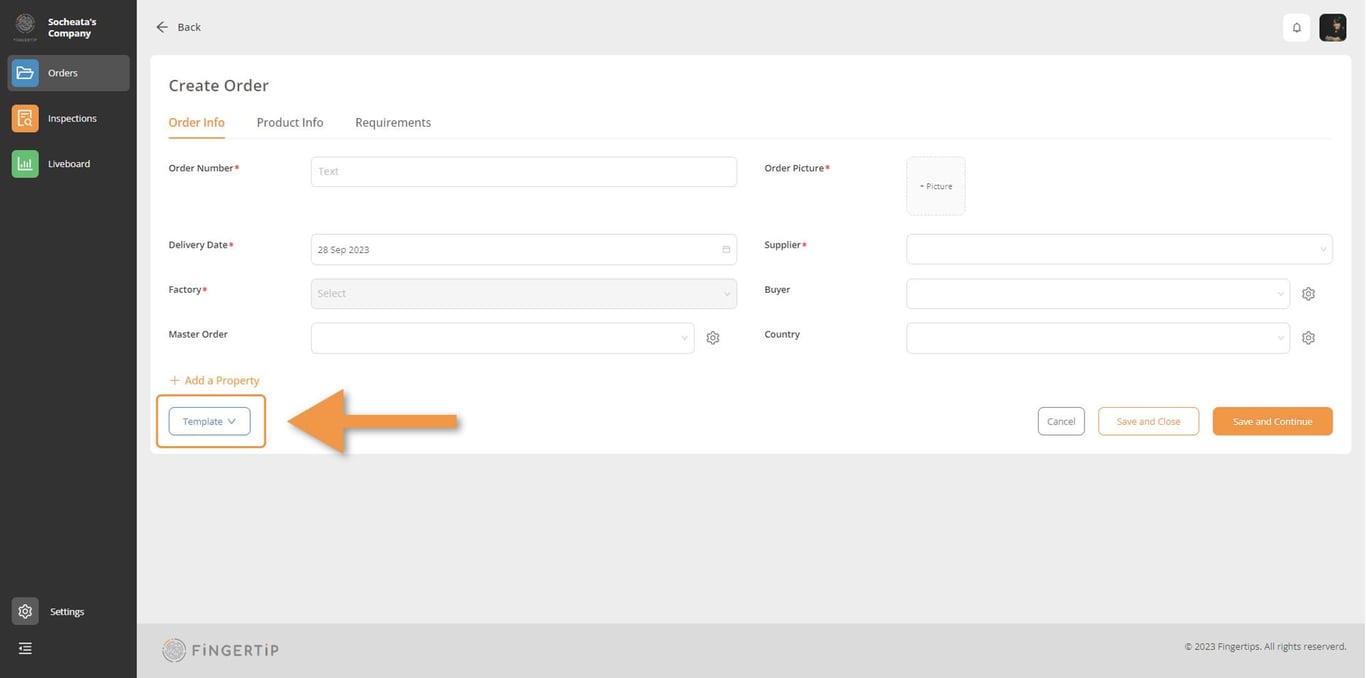
Load a template
The “Load Template” option allows you to select an existing template with the specific custom properties already set up for you to create the relevant order. A dialog box opens as you click on “Load Template” button where you can search and select your template.
Click on “Apply” and your saved properties appear in your order creation page. You can now fill them in.
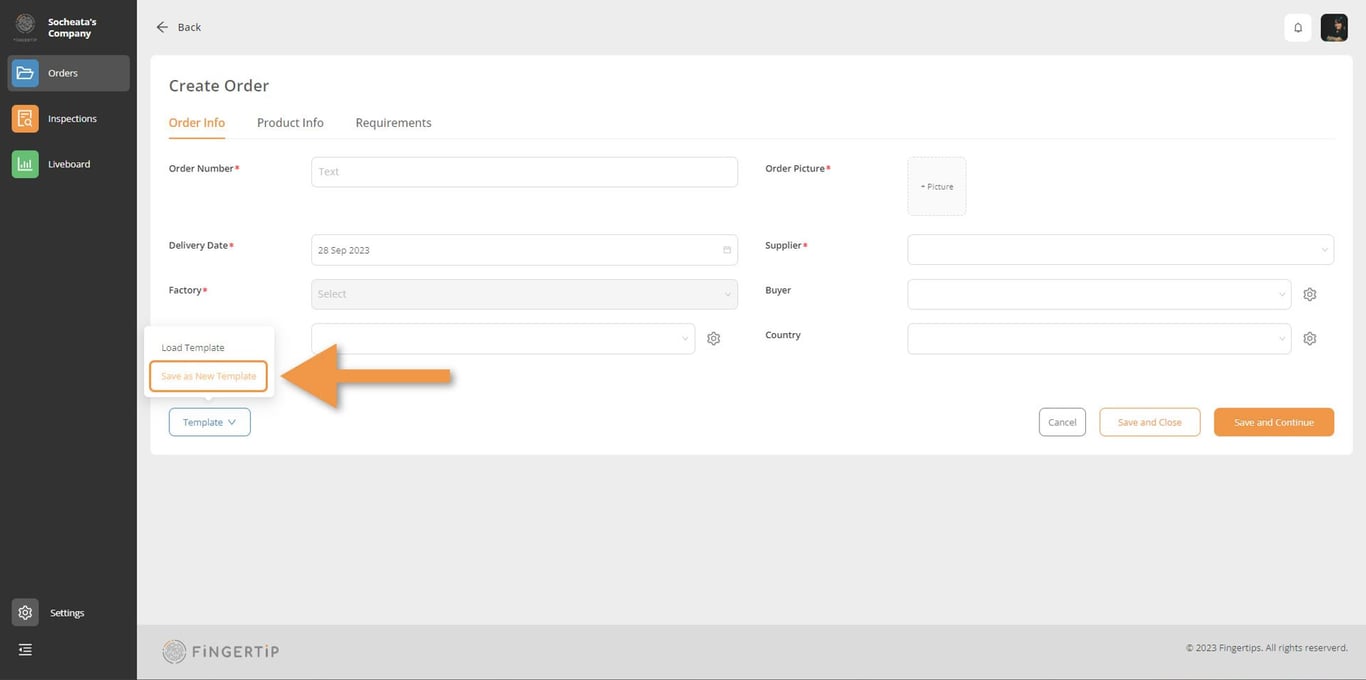
Save as New Template
If you are happy with a certain set of custom properties you can easily save them as a template. Simply click on the “Save as new Template” button
FAQs
What is the purpose of this documentation template?
This documentation template is designed to provide a comprehensive guide to help users understand and use the product. It includes detailed instructions, screenshots, and other helpful information.
How do I access the documentation template?
Duplicate this template in Notion and Copy the code in Bullet Dashboard. You should be able to use this template.
Can I use this template in any languages languages?
Yes, you can use any language for this template.
Step by step guideSummary of Order Creation from Scratch without a template:Detailed steps of Order Creation from Scratch without a template:Order Info TabProduct Info TabInformation sectionAttributes sectionRequirements TabInformation SectionMeasurement SectionWeight Section Detailed steps of Order Creation from Scratch with a template:Select your templateFAQs
 Made with Bullet