List view
New Releases
New Releases
Getting Started
Getting Started
Order Management
Order Management
Inspection Management
Inspection Management
Templates
Templates
Data Management
Use this section to manage all your organization’s information regarding partners, quality processes, order properties and attributes that will be used throughout Fingertip consistently.
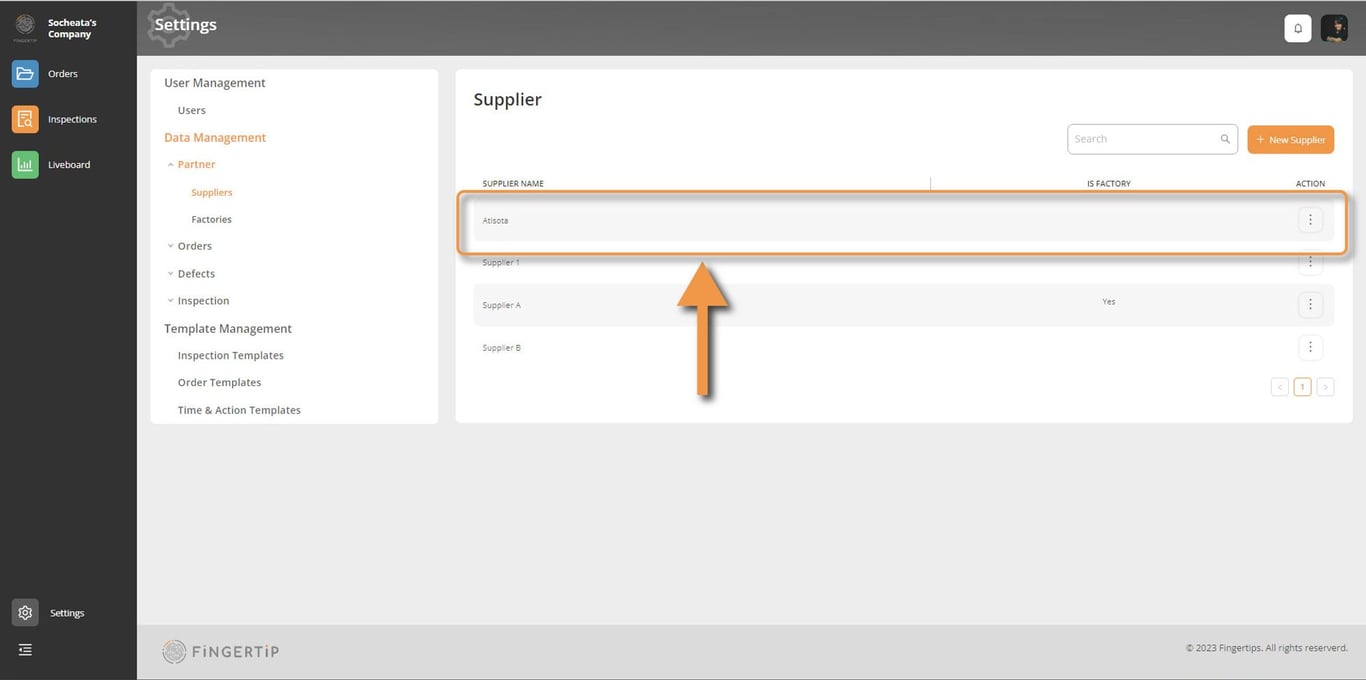
Partners
Create records for all organizations working with you, such as vendors or customers.
Only Admin can add and edit suppliers or factories information in here.
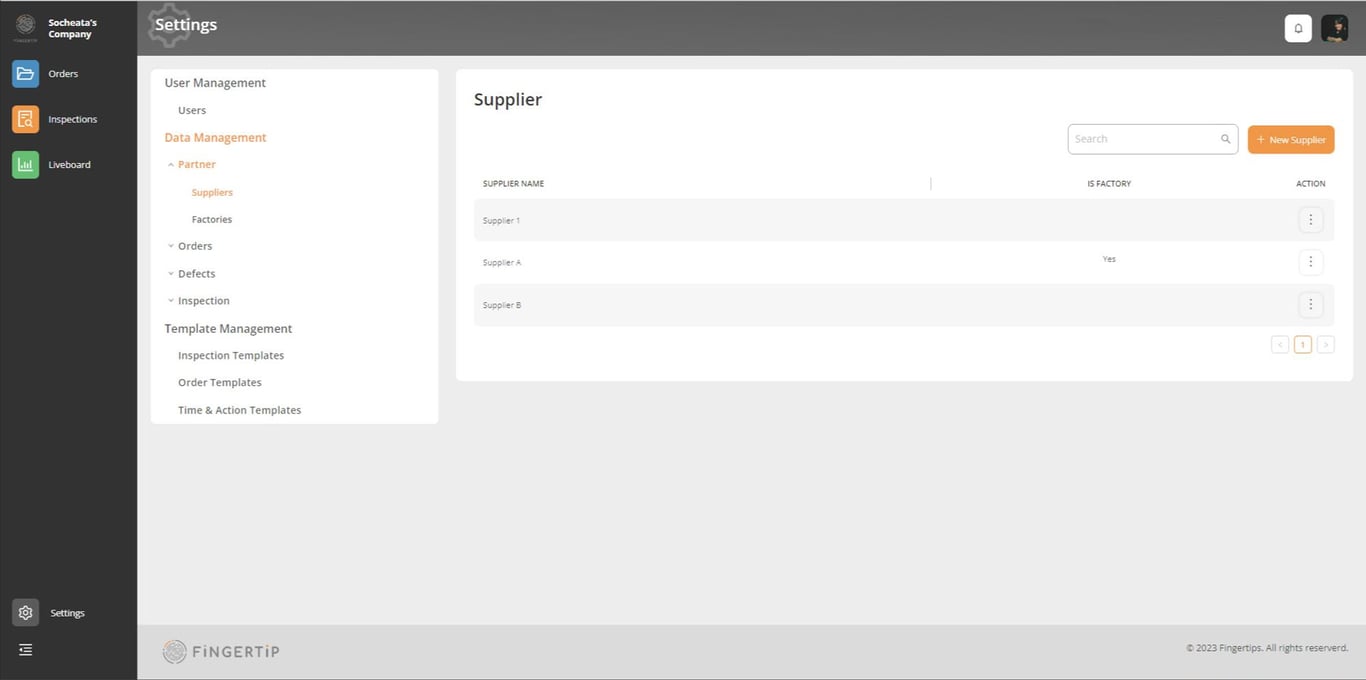
Add new supplier
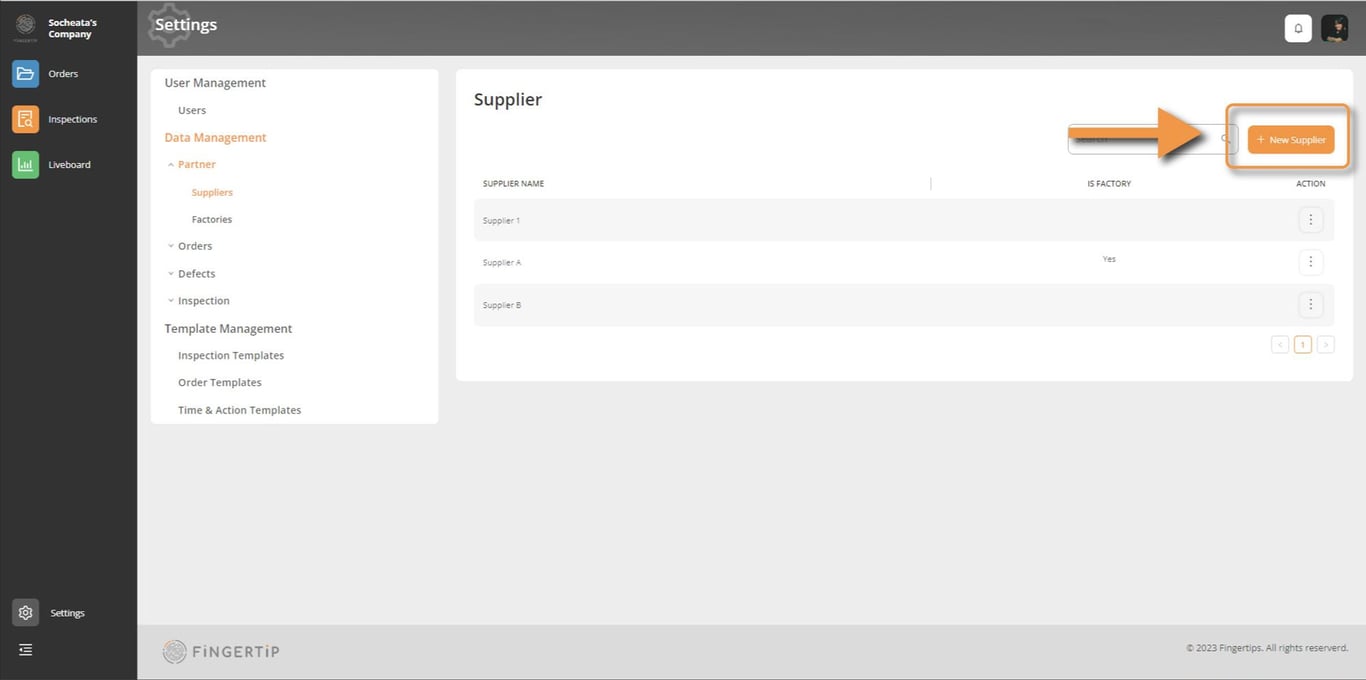
1) Click on New Supplier button
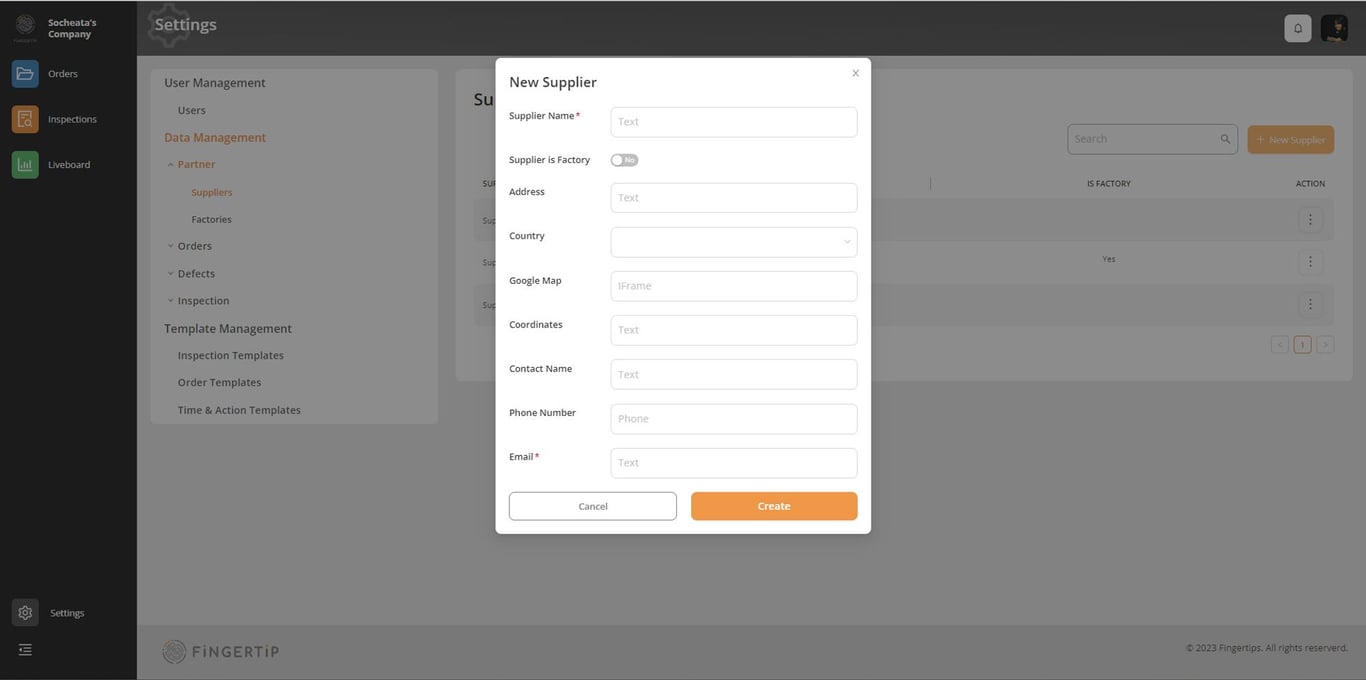
2) Fill in information: You will need to add some information. The information with the red start is the must. You have to fill those.
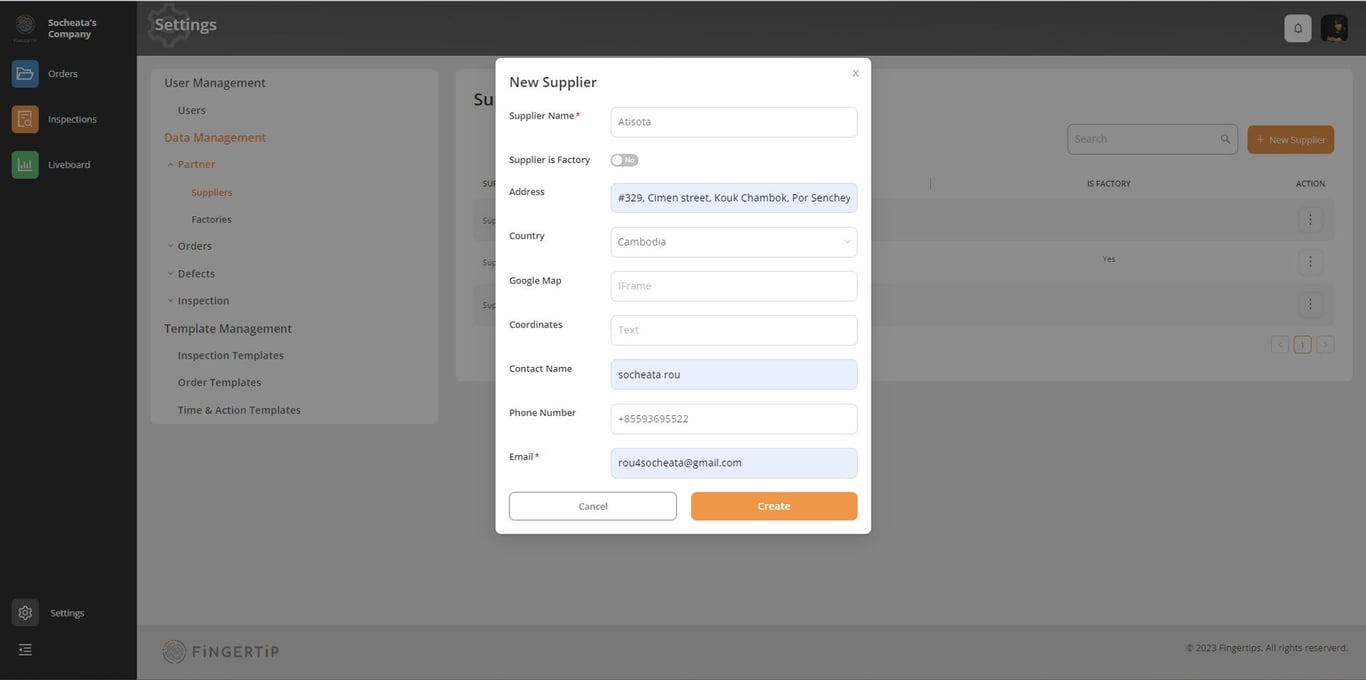
Here is an example
3) Click on “CREATE”: Once you click on Create, this supplier will appear in the supplier list.
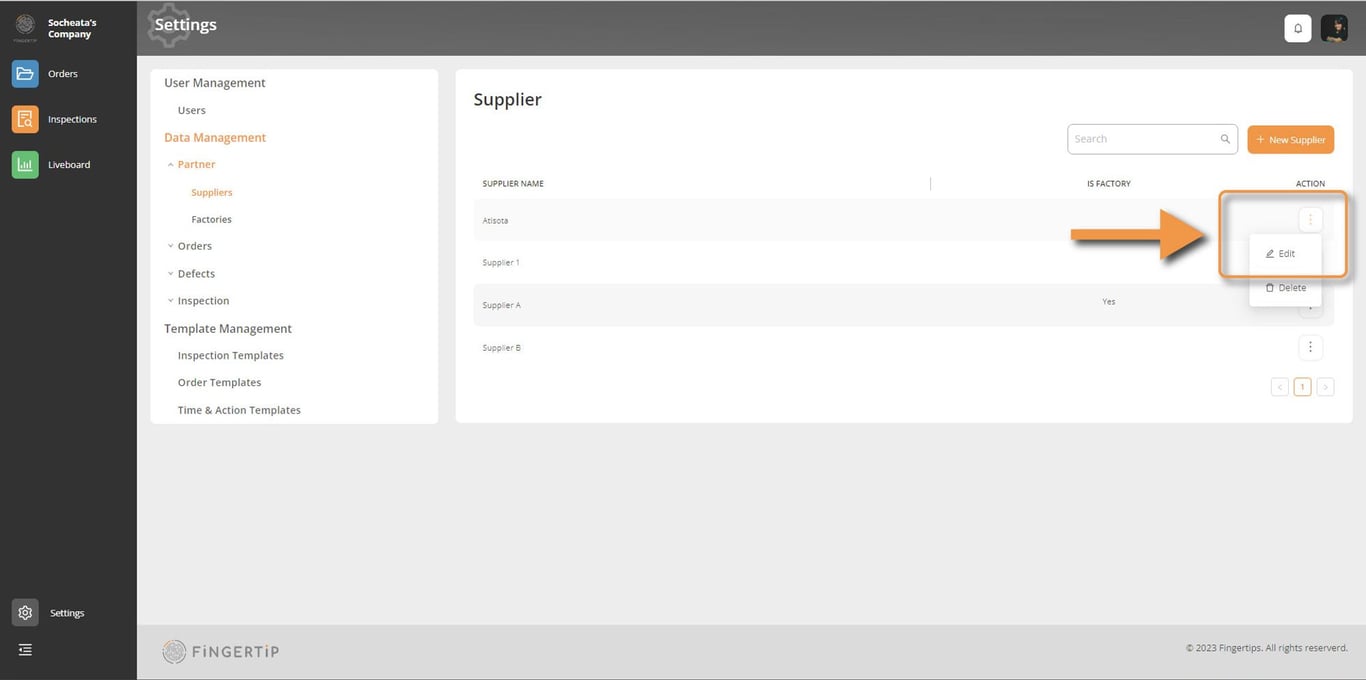
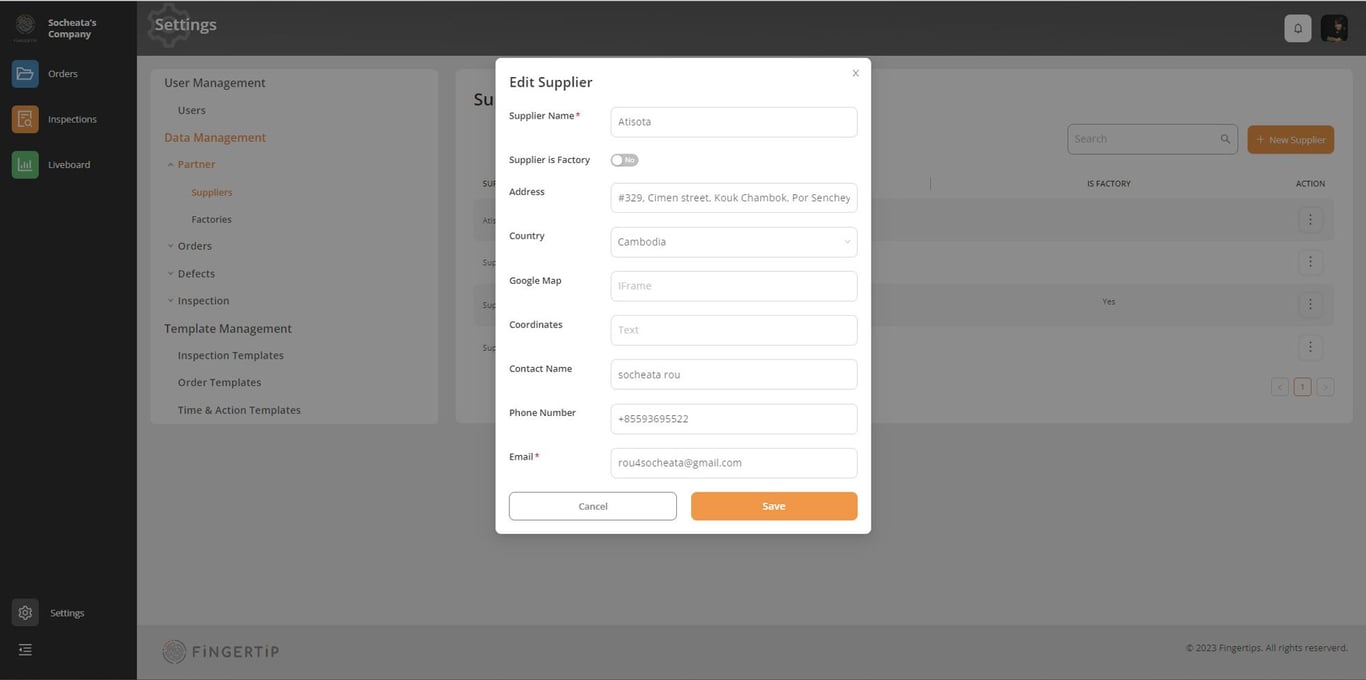
Edit Supplier
If there are updates about your supplier, you can edit this information. Click on the three dots and choose 'edit'.
Then, Edit Supplier pop-up will appear. Edit what is needed and click on Save
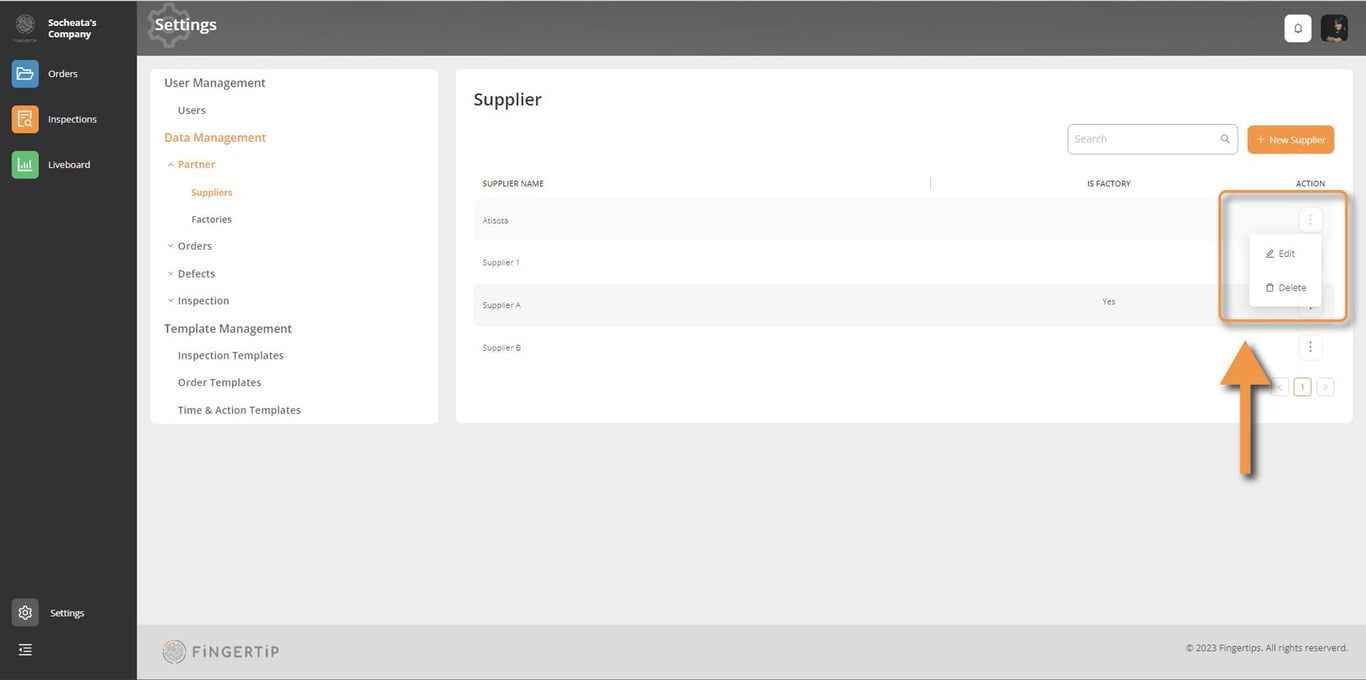
Delete supplier
If you want to delete any supplier, select the 3 dots and click on Delete.
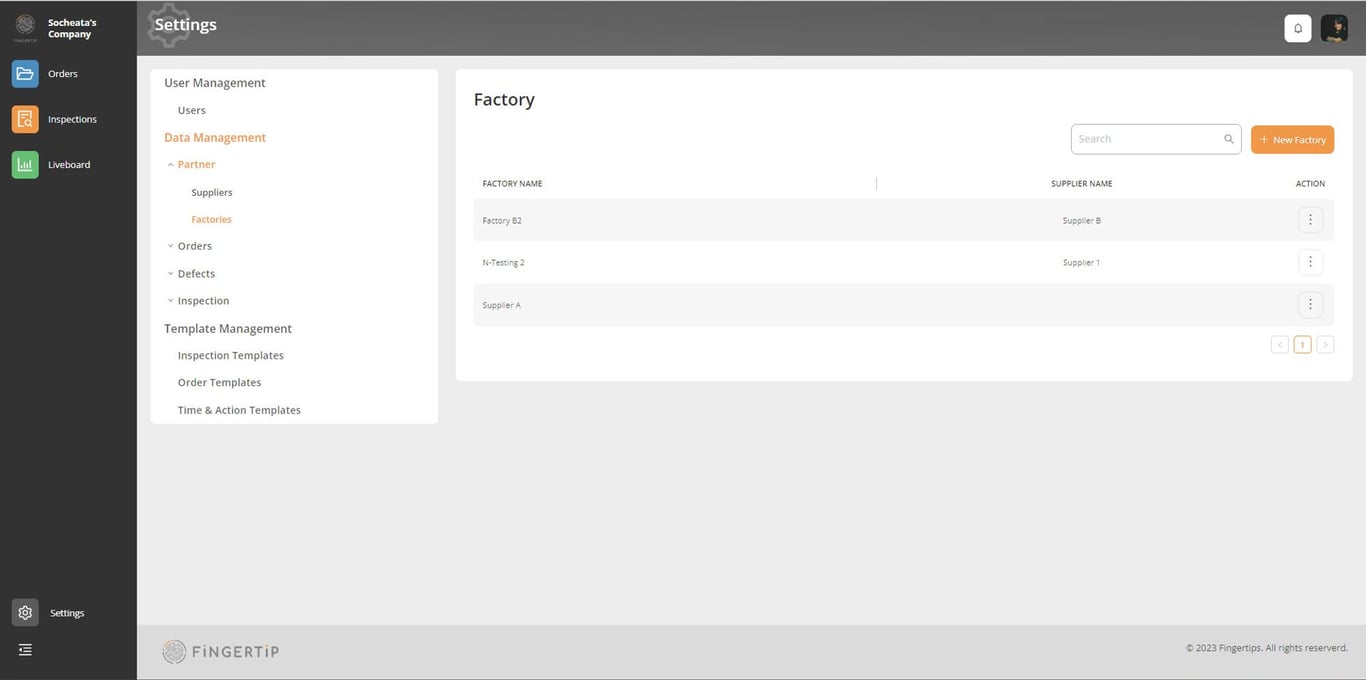
Add new / Edit / Delete factory
The process of adding and editing a factory is the same as with a supplier.
Orders
This section of Data Management enables you to establish your default properties and fields commonly used for creating and managing orders. These will become your standard order properties and terms, utilized across Fingertip.
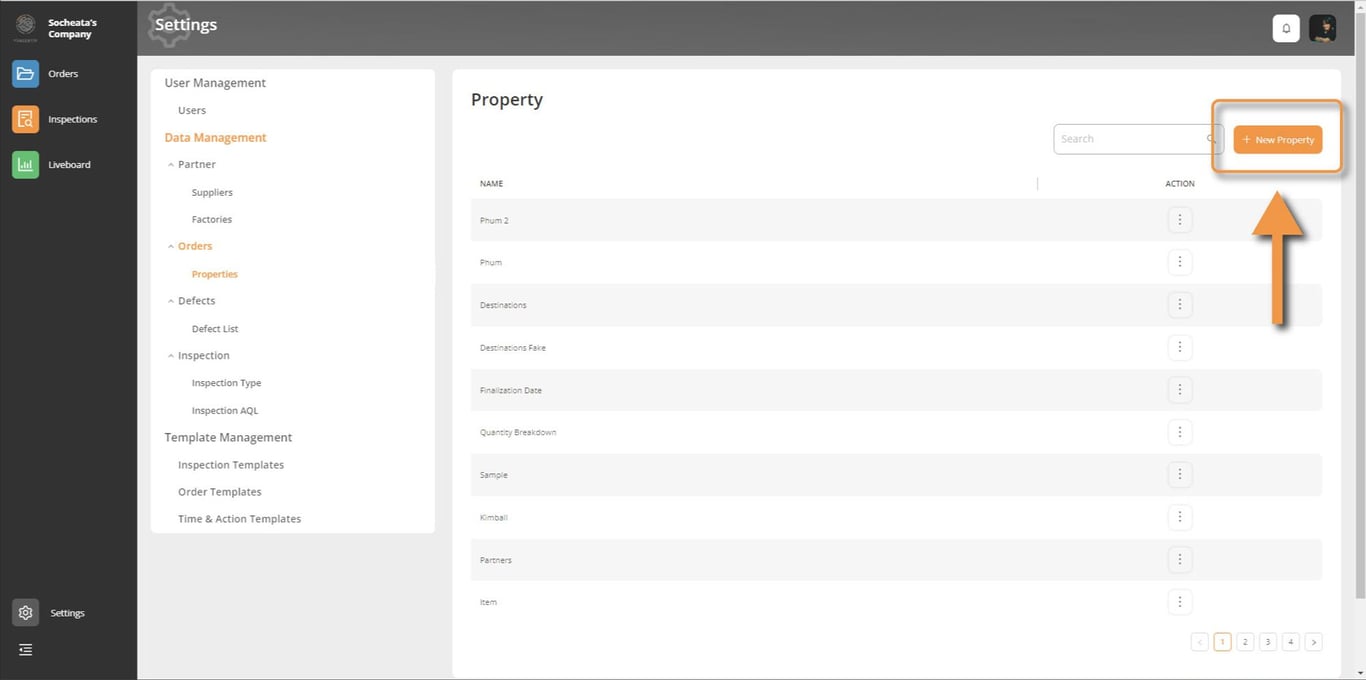
Here is where you can create, edit, and delete properties of the order.

Create Property
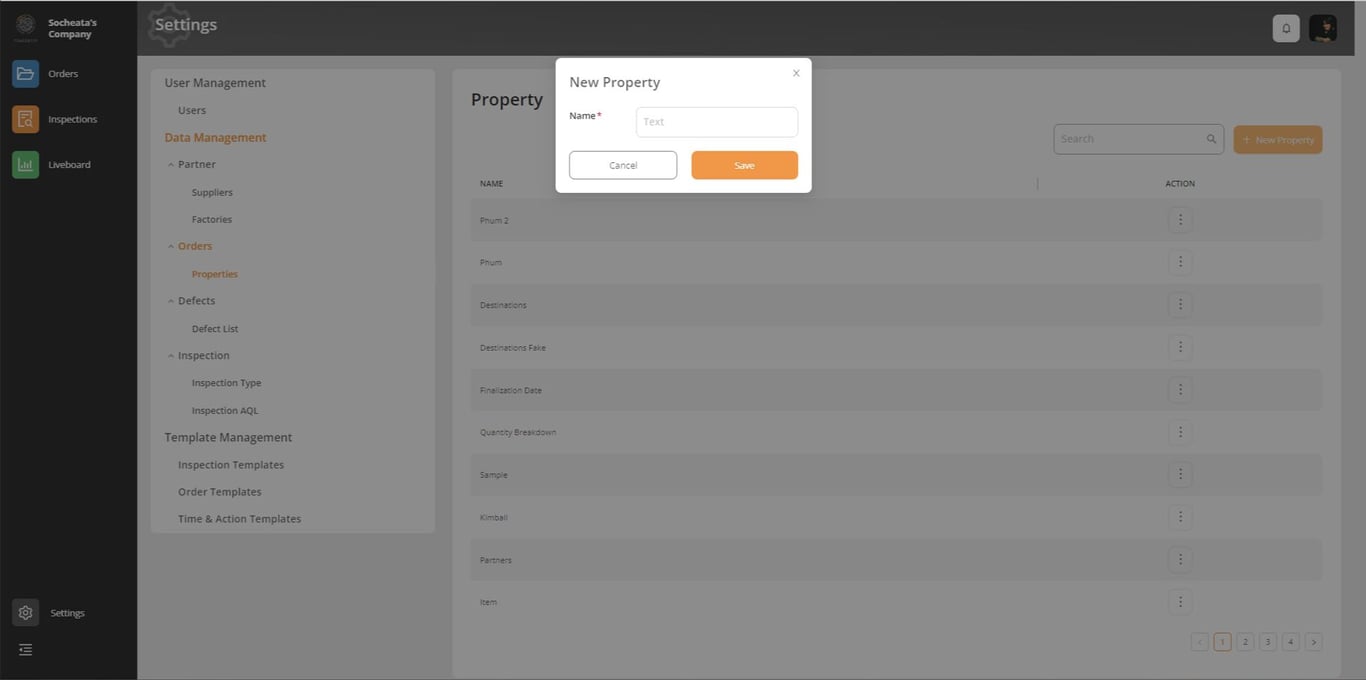
Click on New Property
Add the name and save
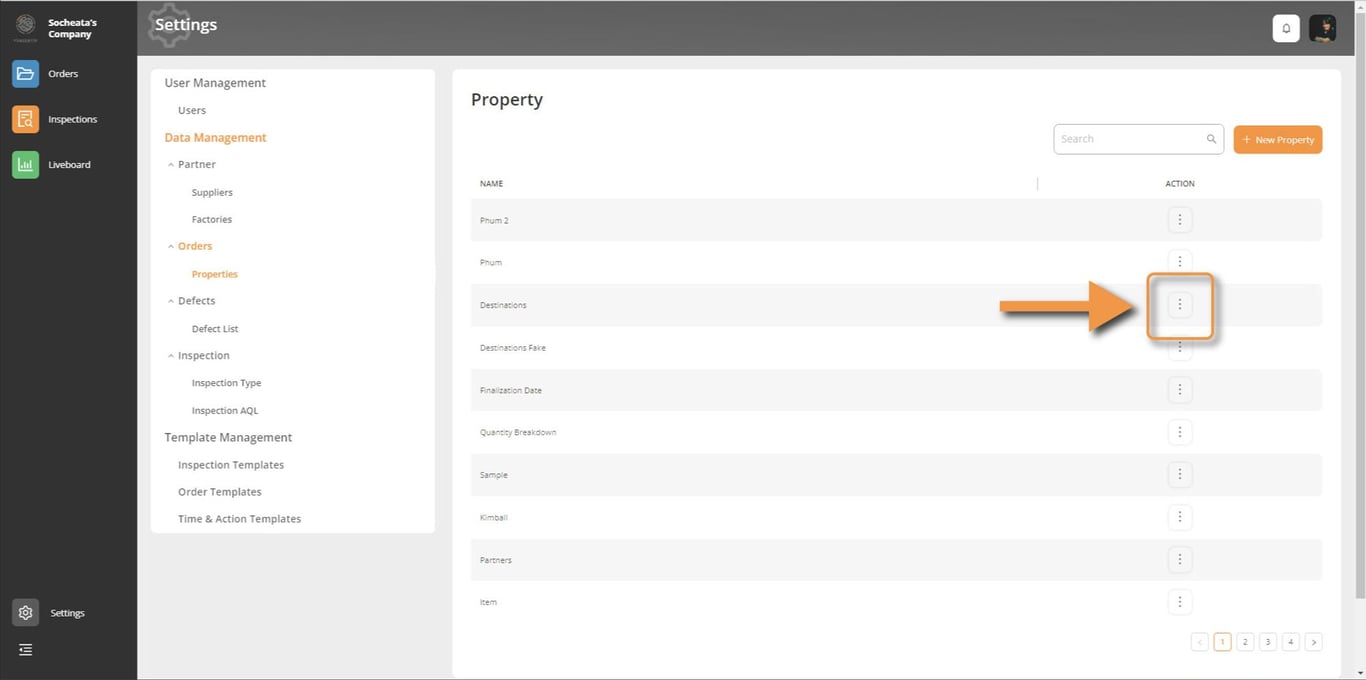
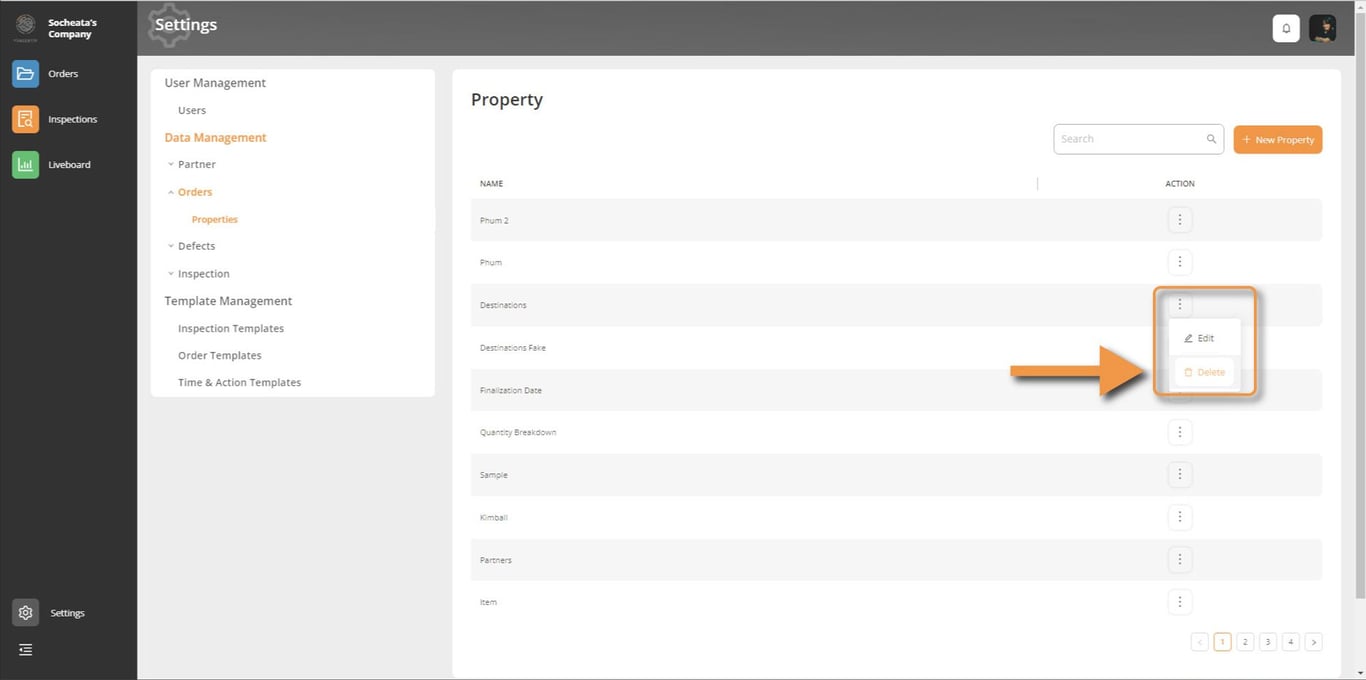
Edit Property
Click on the 3 dots, then select Edit in the list that will appear
You can edit these by clicking on the pencil icons and delete by clicking on the bin icon
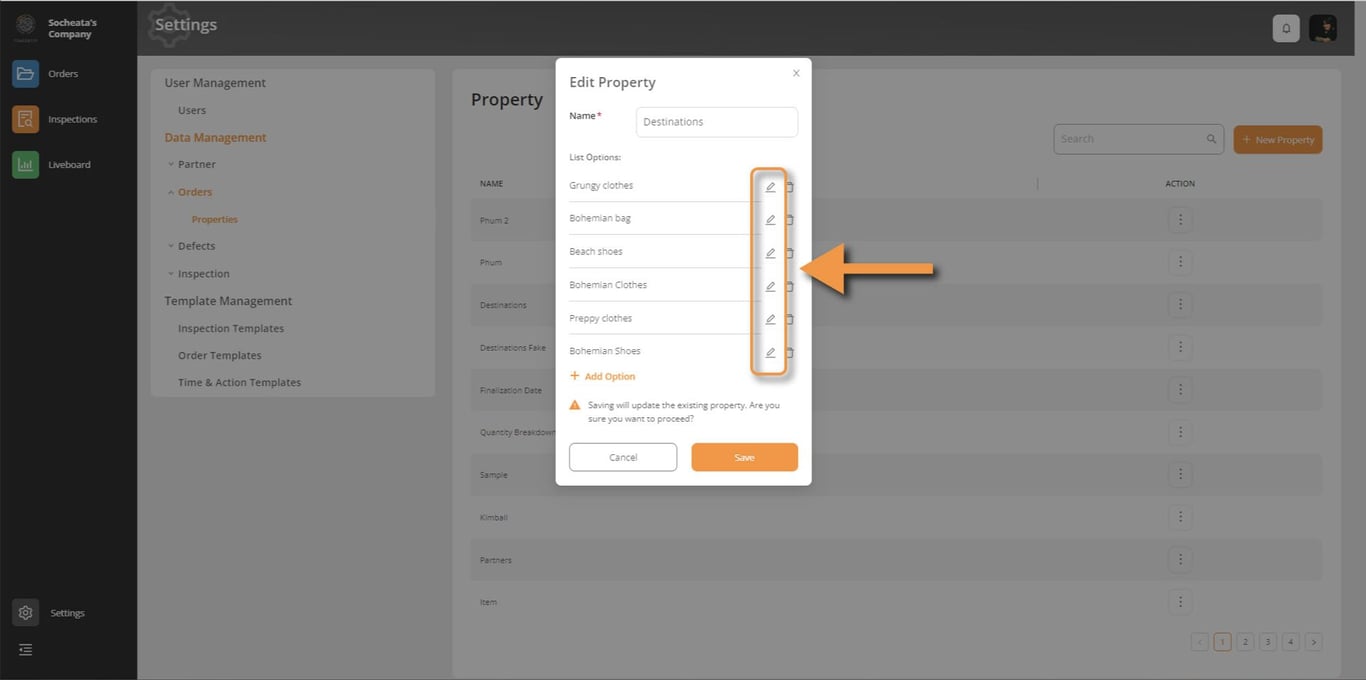
Add More Option: This feature lets you create additional choices for a specific property. These will display as a list once set up.

Delete Property
Click on the 3 dots, and choose Delete
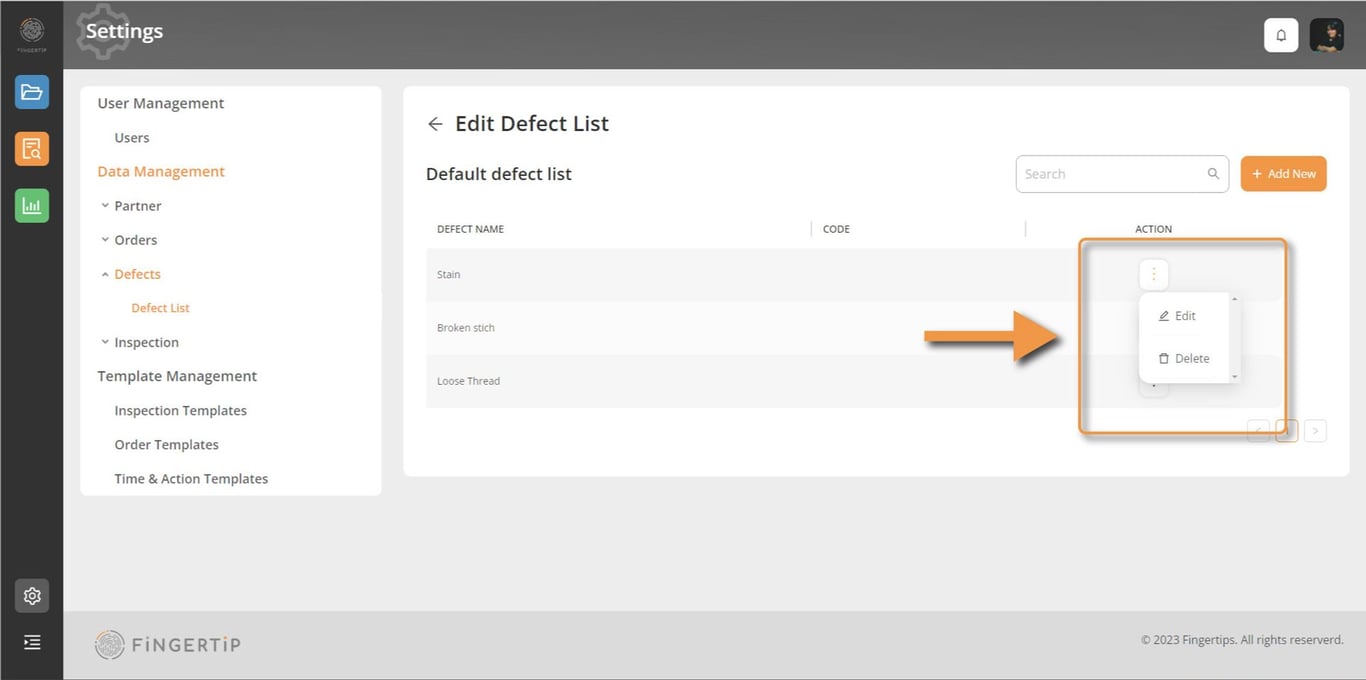
Defect List
Fingertip allows you to create your organization’s specific defect list with your own defect codes so your inspectors can access your usual defects while conducting inspections.
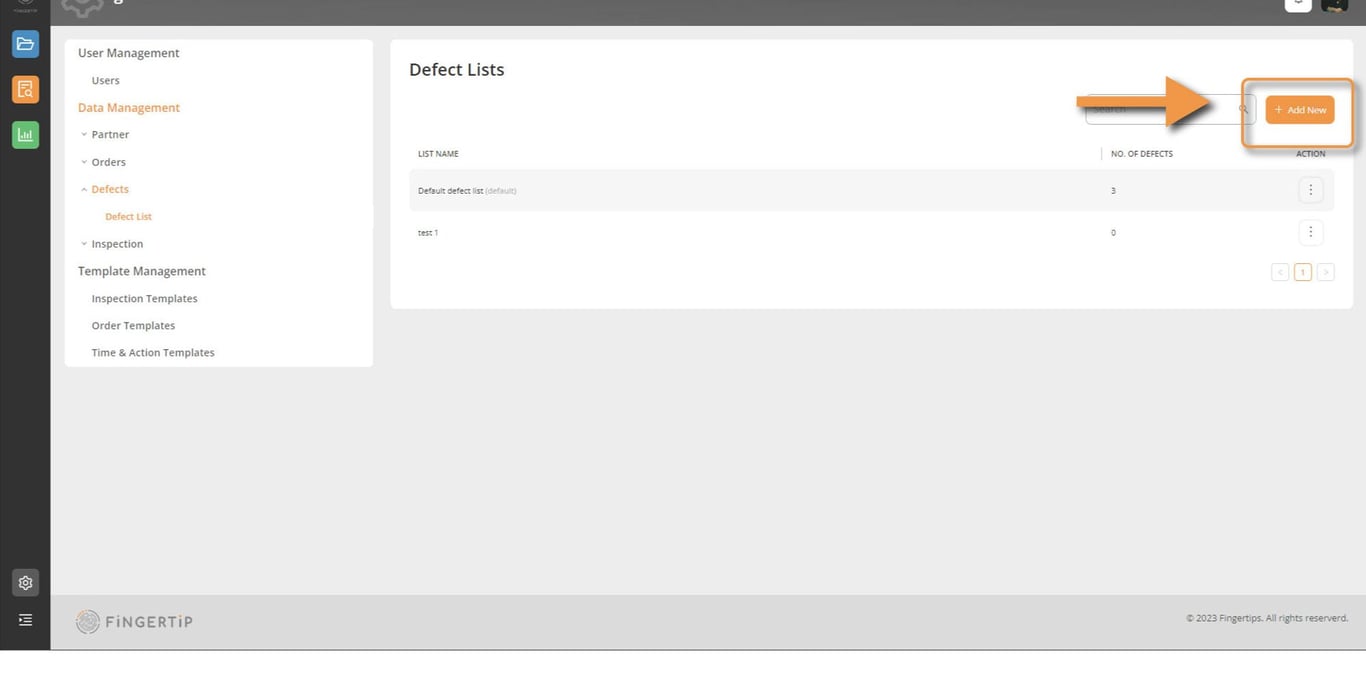
As shown in the example below, you can create various defect lists, for example one per product category, or one per customer, etc… Fingertip allows you to create as many lists as you want.
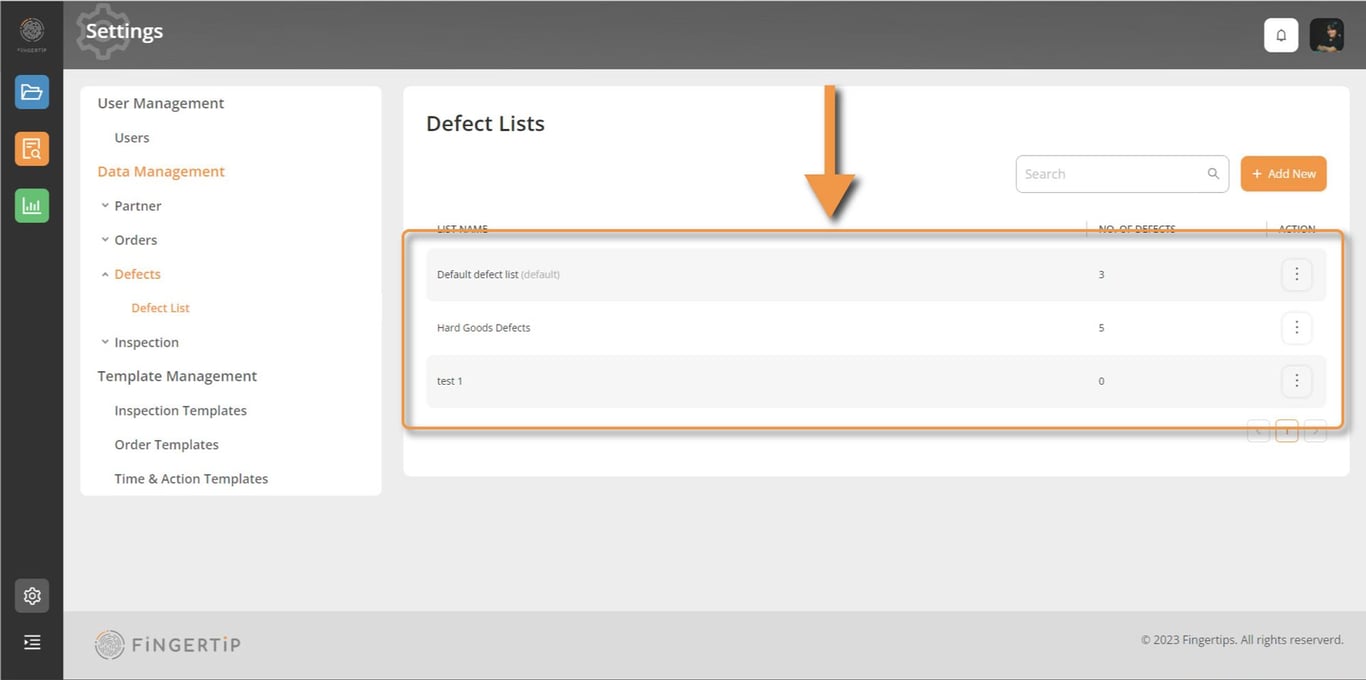
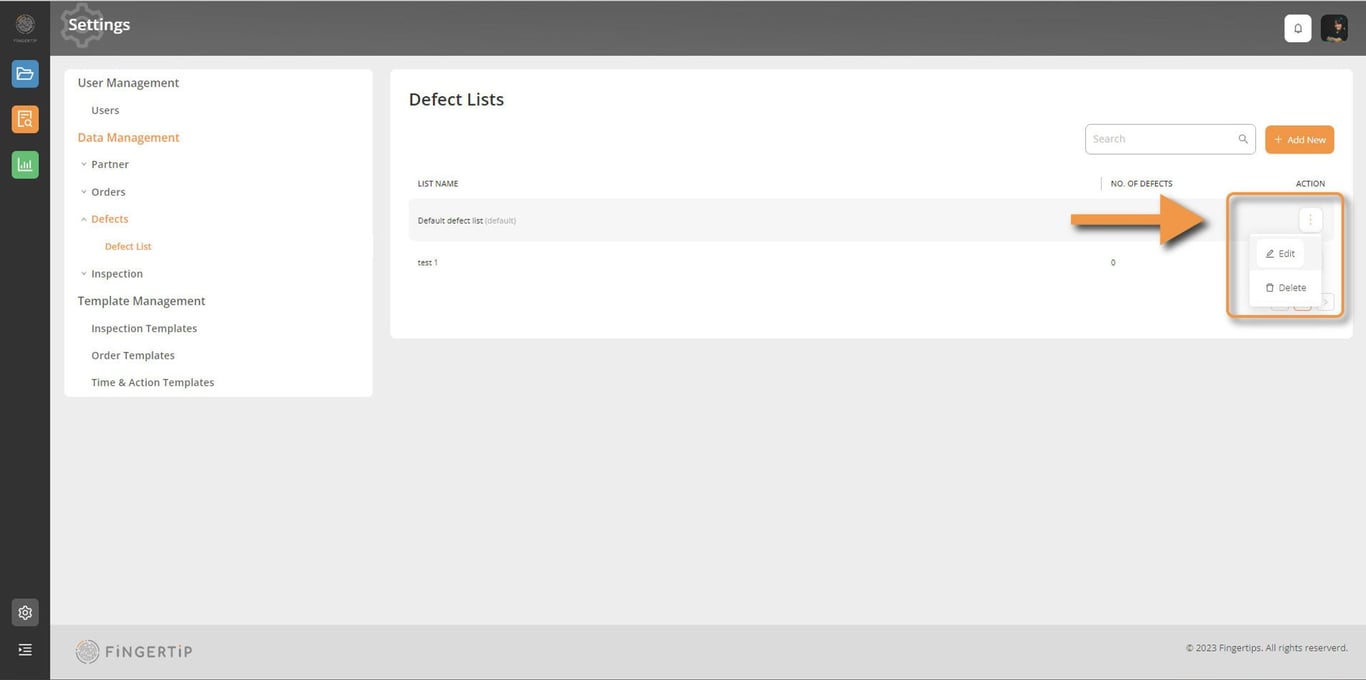
Access Defect Lists
To access the defects inside a list, simply click on the list
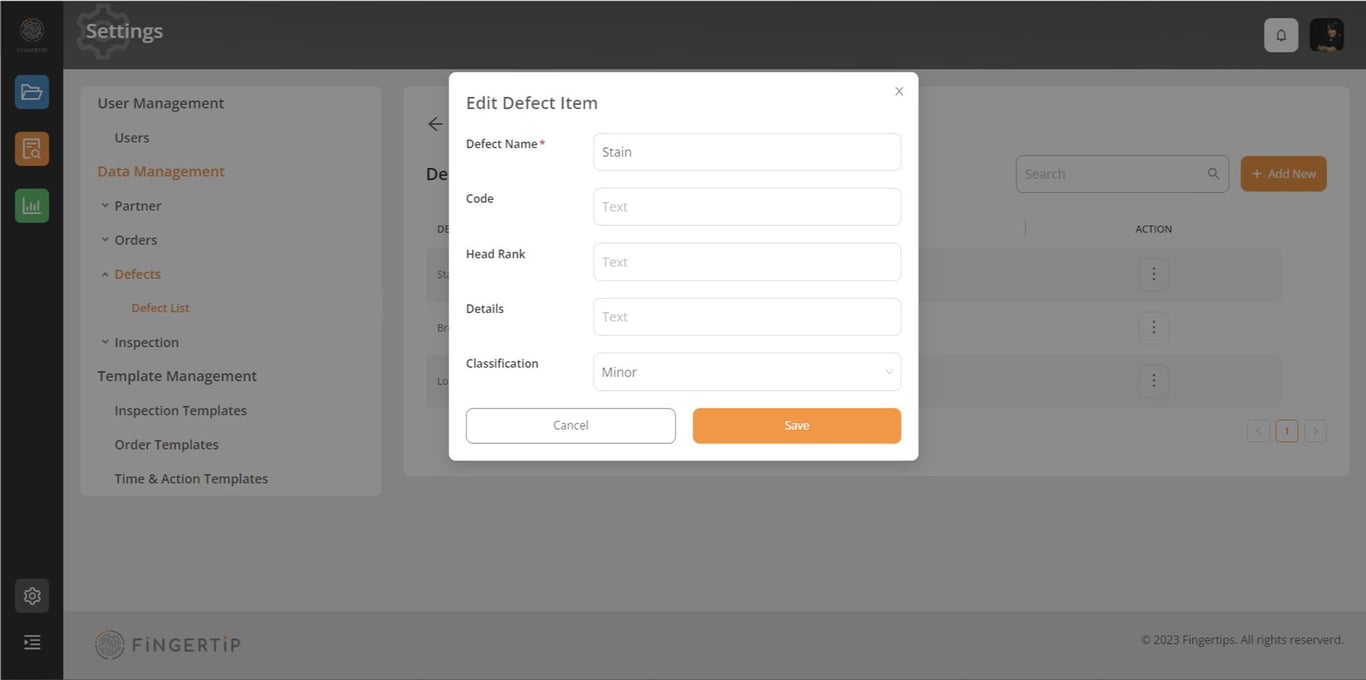
Edit a defect
To edit a defect in the defect list, you can click on the three dots and chose Edit or Delete.
When you chose to Edit a defect, fill in all the information and click on save.
Create a defect
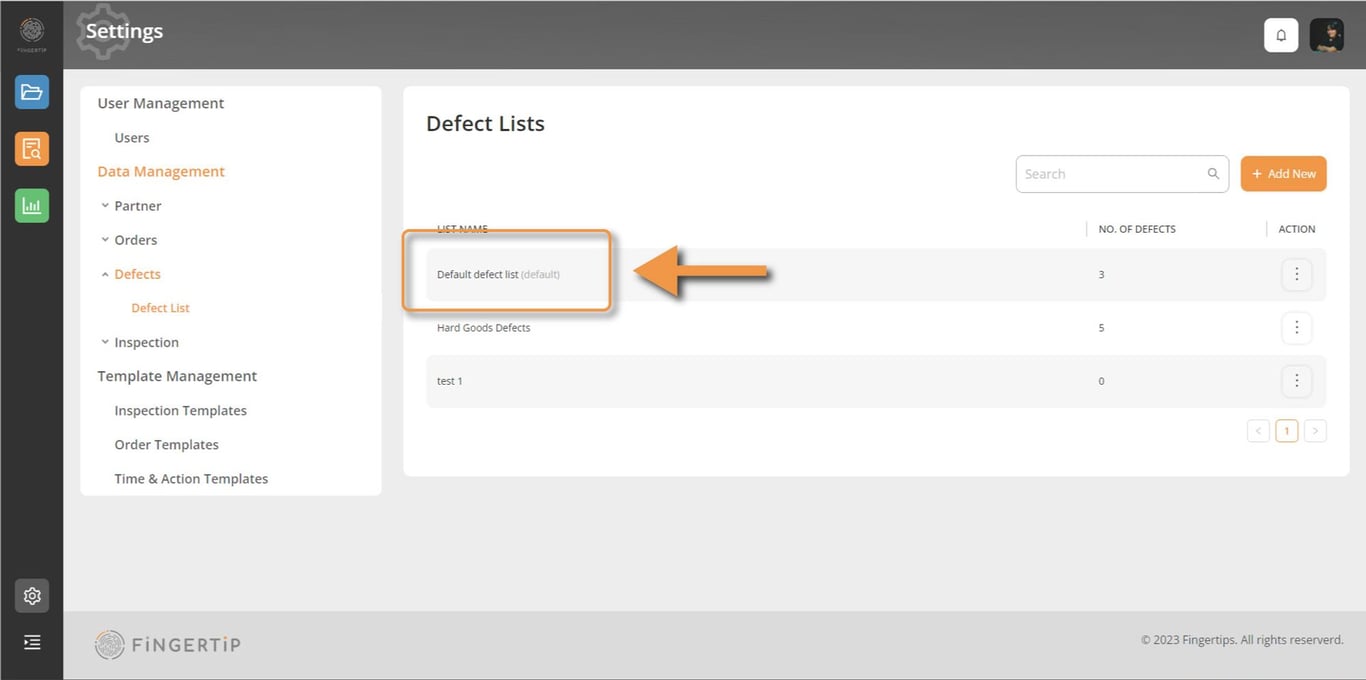
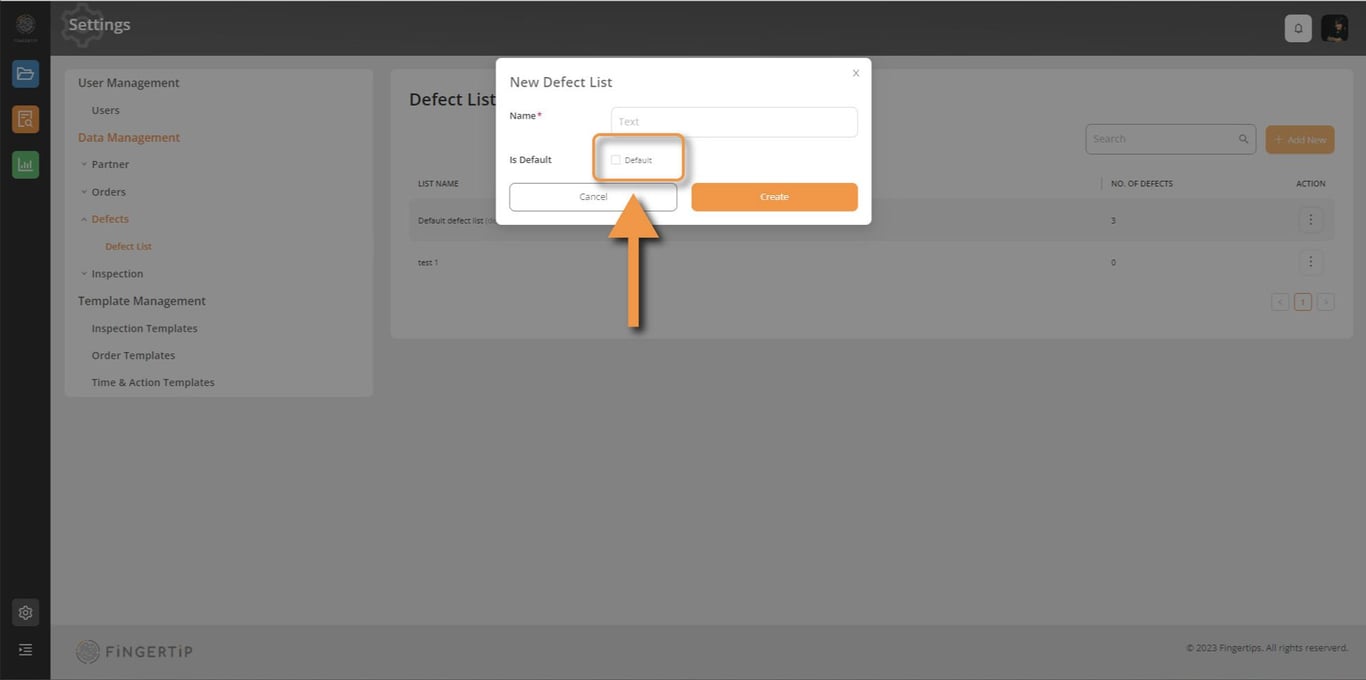
To create new defect list, click on Add New.
Click on the Default button if you want that defect list to be your organization's default. This will make it appear automatically in your inspection app. When you're finished, click Save.
Click on the three dots on the right side of the list to edit or delete it.
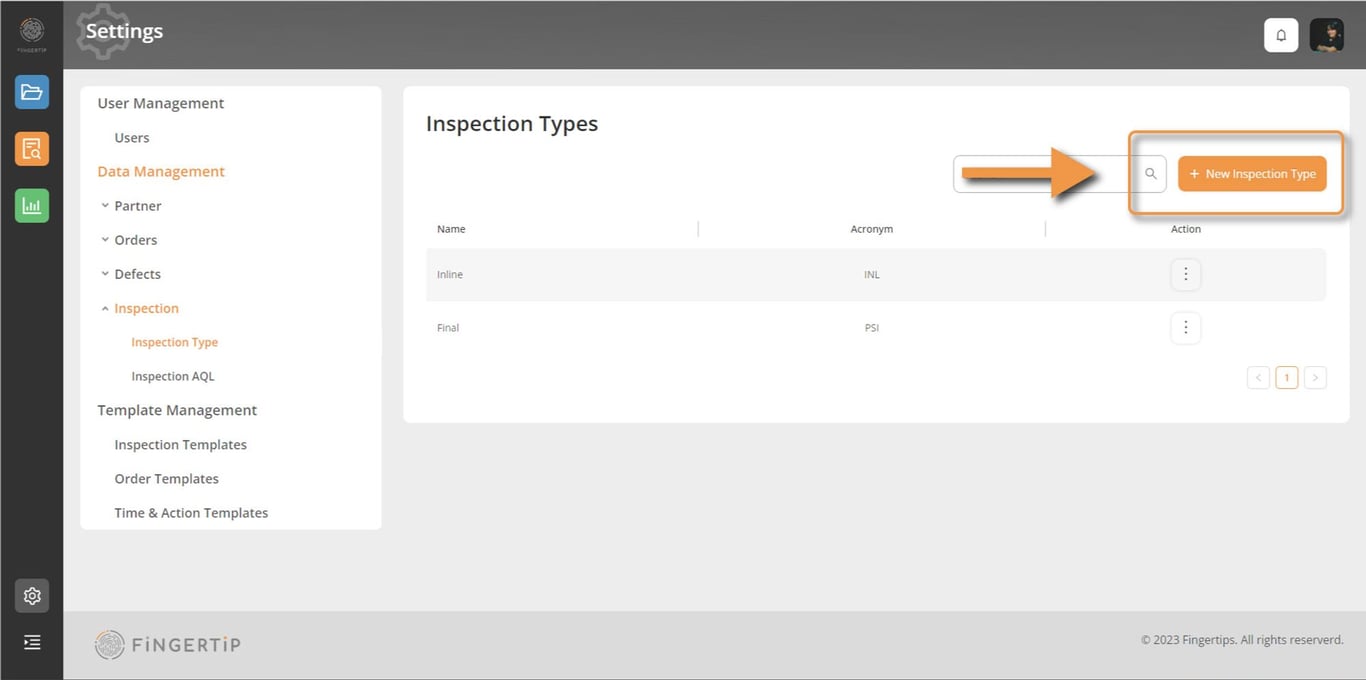
Inspection Type
This property is a key identifier that enables you to specify the various types of inspections you wish to conduct in Fingertip. When creating an inspection, you can select its type and associate it with a specific template.
Create an inspection type
Select “New Inspection Type” button to create new inspection type.
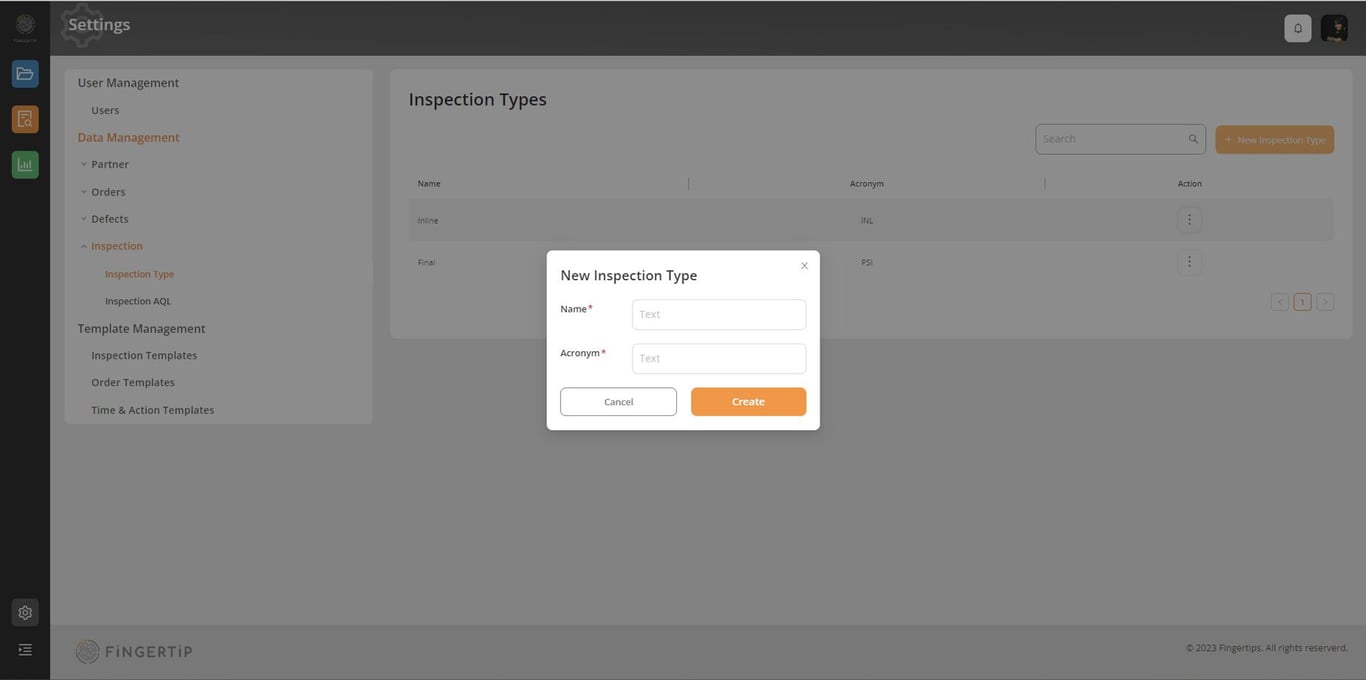
Enter the required information: provide a name and, if it's too long, an acronym for easier reading within the app. Once completed, click save.
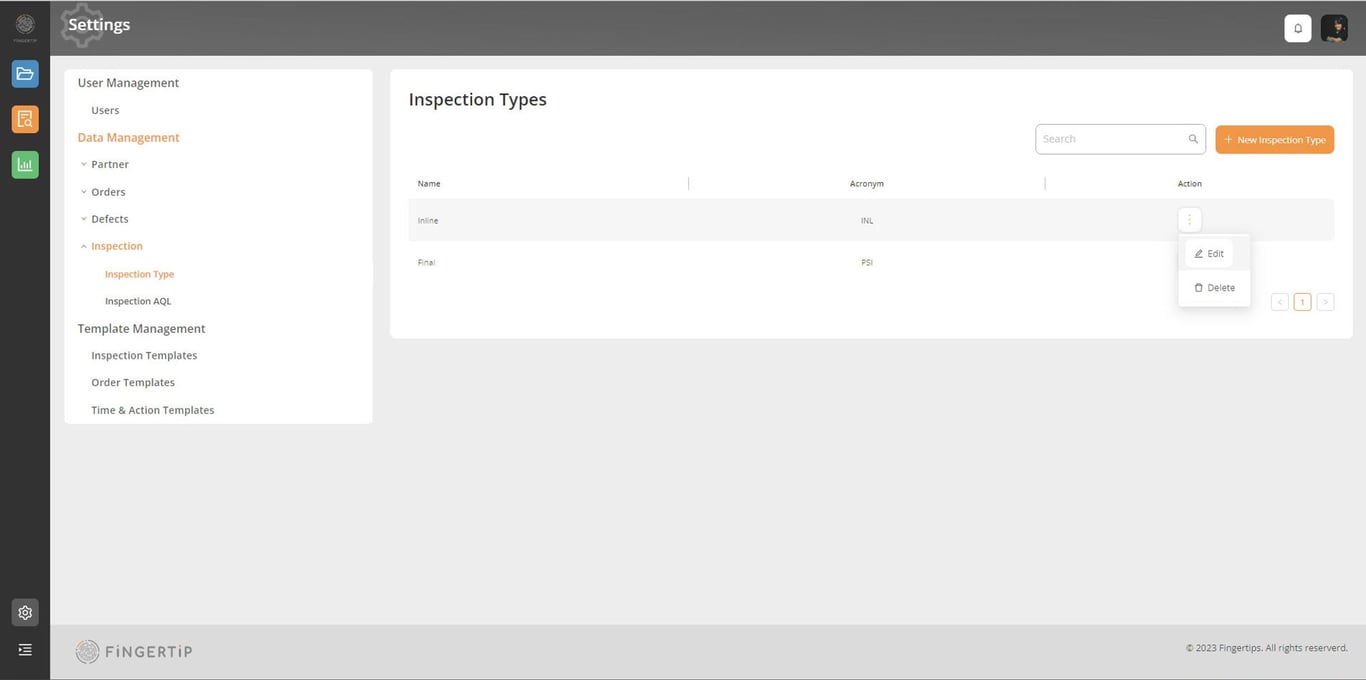
Click on the three dots on the right side and chose Edit if you want to edit your inspection type or delete it.
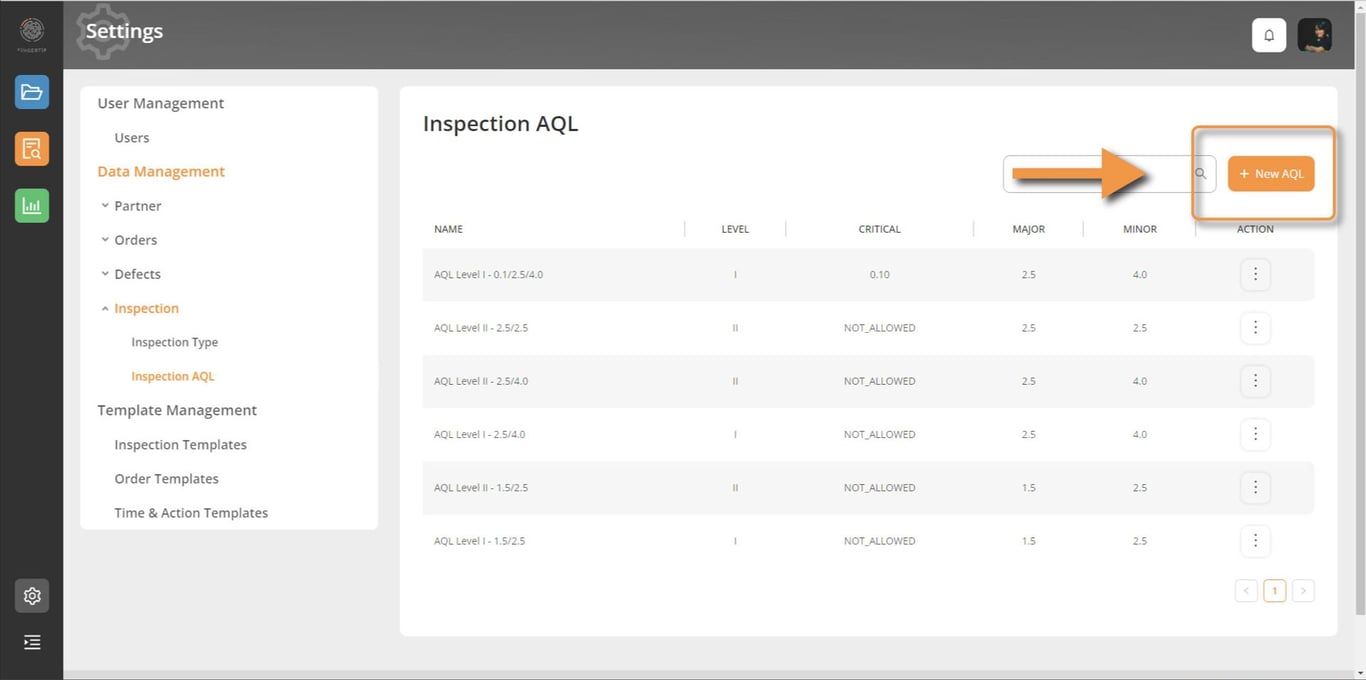
Inspection AQL
Fingertip allows you to create as many AQL levels as you need, along with any calculation rules for your inspections, such as no calculation for 100% inspection, or rules specific to your organization. This data is crucial if you plan to conduct inspections in Fingertip, and it will be required when you set up your inspection.
Create an AQL level
Add new Inspection AQL by clicking on “New AQL” button.
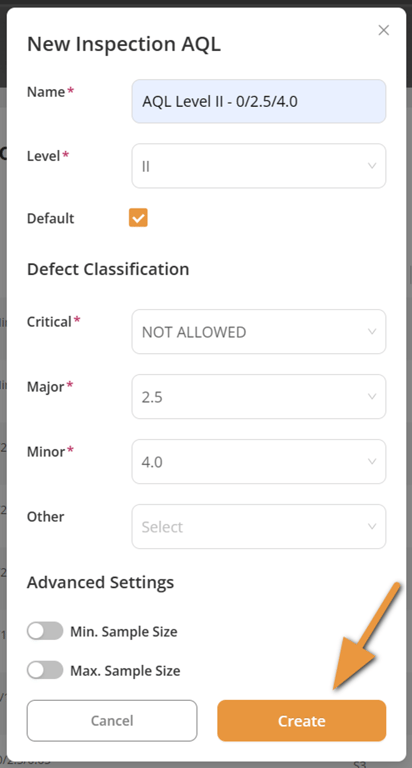
- Creating an inspection AQL without Min/Max sample size
- Fill in all required information for the new AQL then click Create
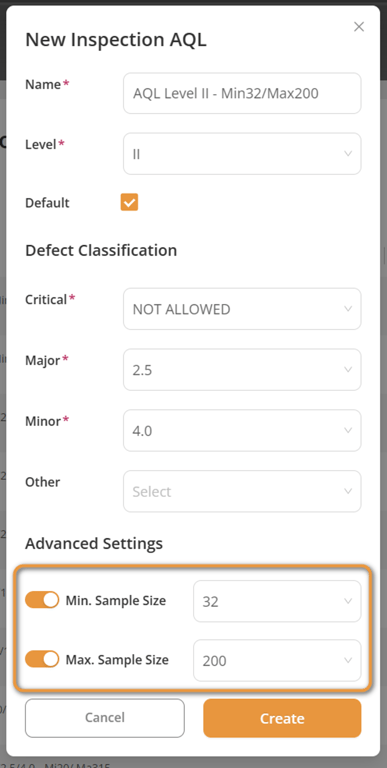
- Creating an AQL level with Min/Max sample size
- Fill necessary information for the new AQL
- Toggle to enable Min or Max sample size and select the appropriate value. This can be either Min only, Max only or both.
- Click the Create button
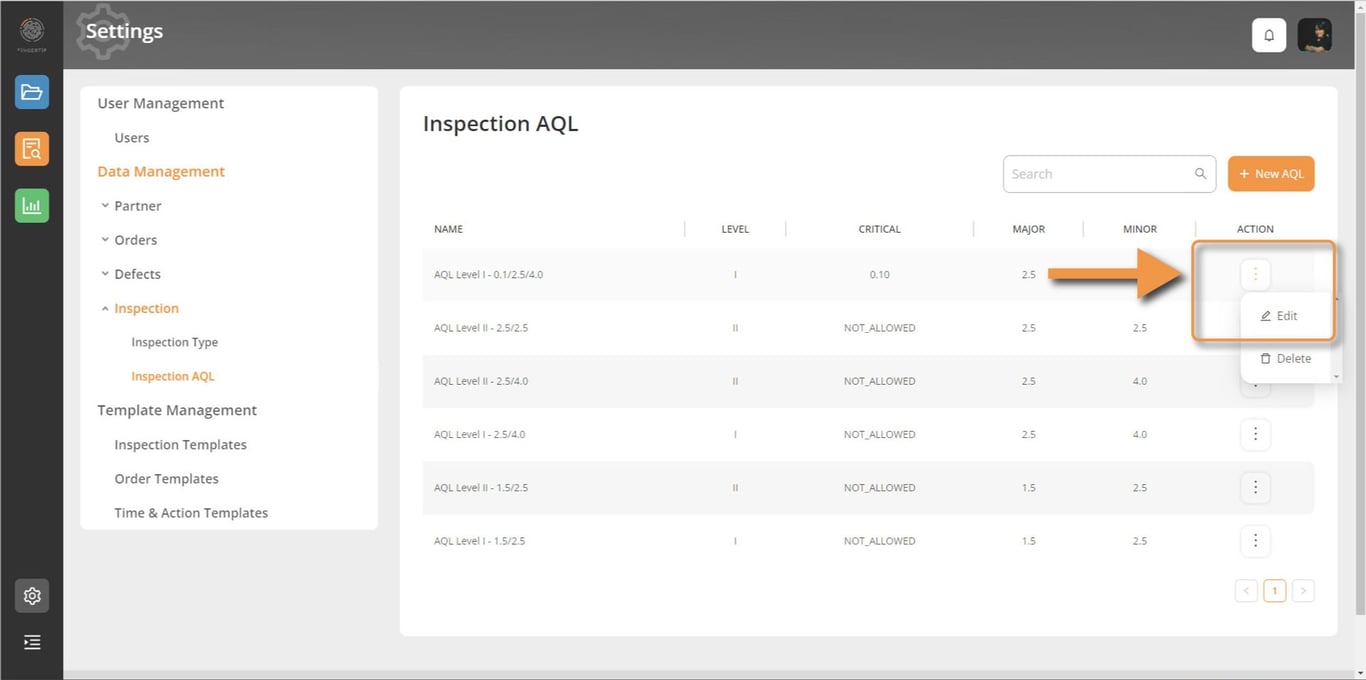
Edit or delete an inspection AQL by clicking on the three dots and choose the required action
 Made with Bullet